
Excel import sheet instructions
There are two ways to add items to Trail:
- Using the Excel import template – Recommended for adding multiple items at once.
- Directly in the system – Ideal for adding just a few new items.
This guide will show you how to correctly fill in the Excel import template so that your new items are imported accurately into the system.
Download the Excel import template and instructions here: Trail equipment inventory sheet
⭐ Important Notes Before You Start
- Columns highlighted in blue are mandatory — always fill these in.
- Check whether the same model, category, or location already exists in Trail. If so, use the exact same spelling to avoid duplicates.
- If your organization uses columns not included in the template, you can add them manually.
- If you don’t have the information for a field, you can leave it blank (except for mandatory fields). Missing details can be updated later directly in Trail.
Mandatory Information
To add a new item, at minimum, the following fields must be filled out:
- Department
- Defines which department the item belongs to and who can see it in Trail.
- An item can belong to only one department.
- Examples: Stage, Sound, Lighting, IT, Biotechnology, Automotive, North Fire Station.
- Category
- Describes the type of item, and groups similar models together.
- Use clear and general names.
- If needed, you can add subcategory and second subcategory columns to provide more detailed classification.
- Examples: Computers, Vehicles, Wigs.
- Manufacturer
- Enter the manufacturer’s name if known (e.g. Apple, Dell, Volvo).
- Model
- The official model name given by the manufacturer.
- If unknown, use a generic name (e.g. Coffee maker).
- One model can belong to only one category.
- Item Type
- Determines which additional fields are visible for the item, beyond basic and cost details.
- The most common type is Item (device), which displays fields like serial number and warranty.
- Other examples:
- Case – weight and size details
- Vehicle – e.g. license plate number
- If you need new item types or custom fields, contact Trail Support.

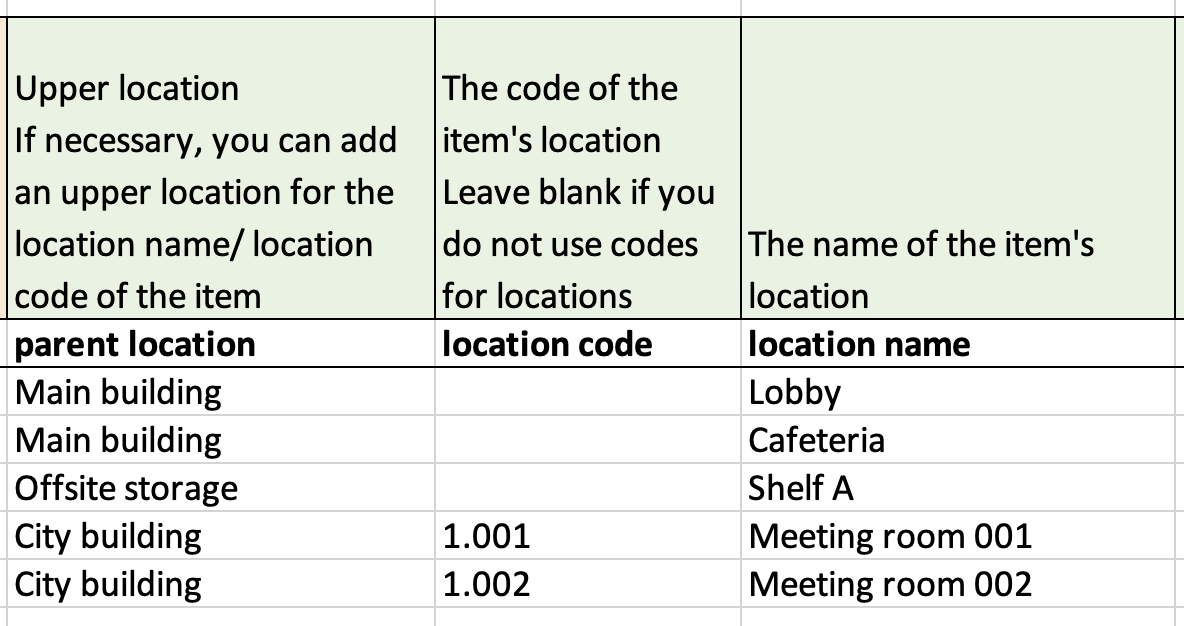
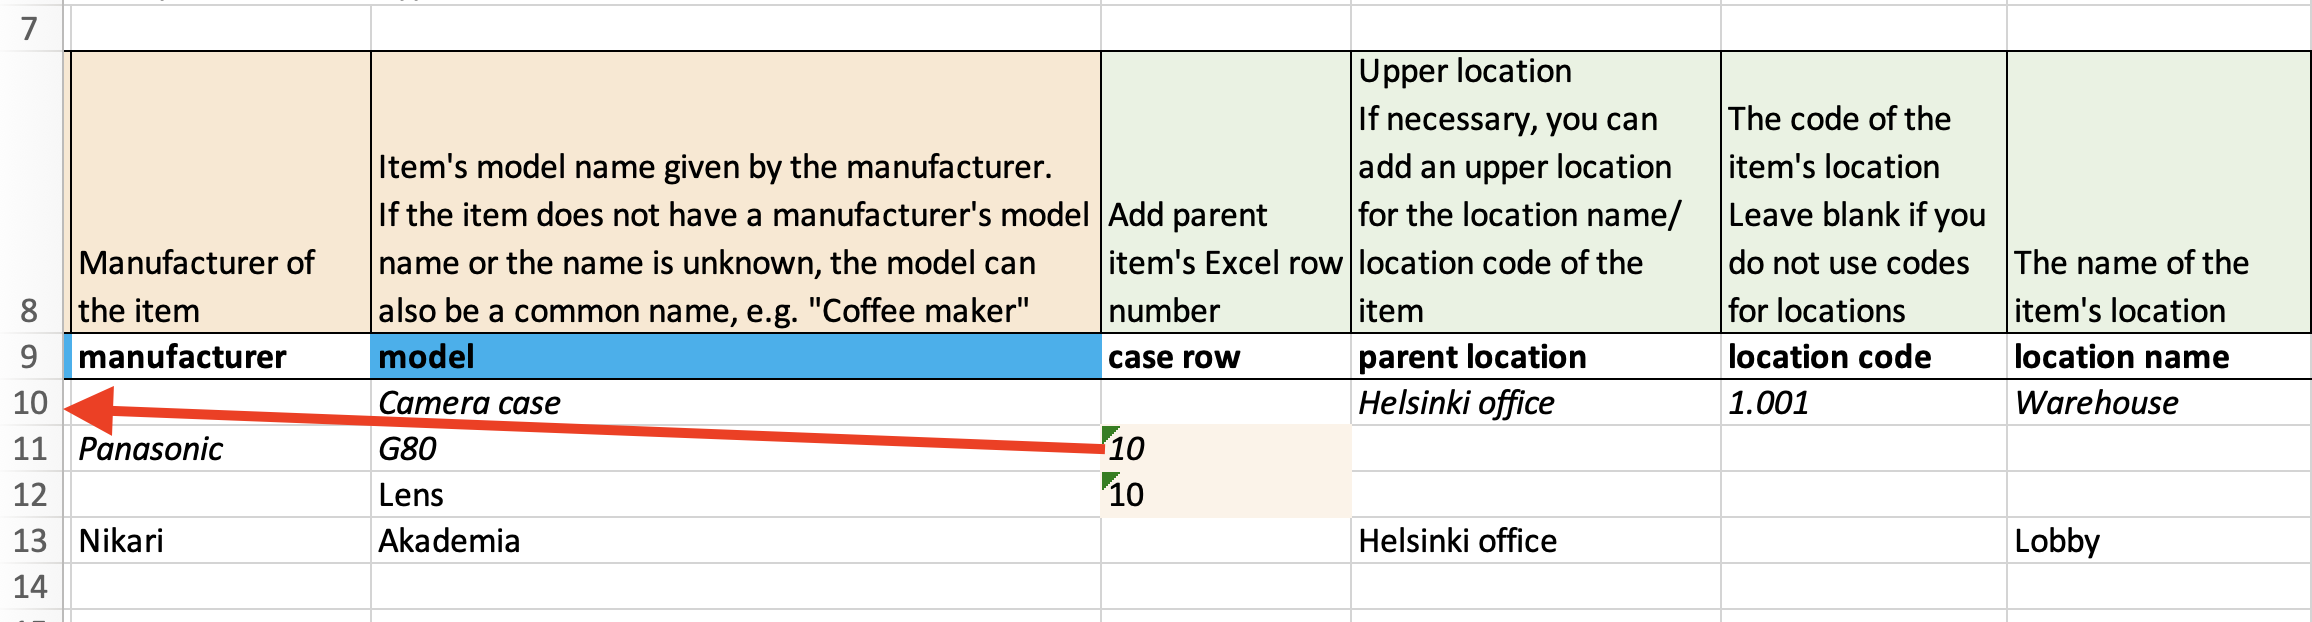
Item Location
The item’s location describes where it is physically located or which other item it belongs to.
1 Physical Location
For physical locations, use the following columns in Excel:
-
Location name – Name of the room or space where the item is located.
Location code – If the space has a unique code, enter it here. If not, leave blank.
- Example: Room name: “Meeting Room Cloud” and door code: “1.001” → enter 1.001 in Location code.
- Parent location – Use a location hierarchy if there are multiple buildings.
- Example: Parent location = building name, Location name = room inside that building.
2 Belonging to Another Item
If the item belongs to another item, use the case row column:
- Add the parent item on its own row with its physical location.
- Add the child items (contents) on their own rows.
- In the case row column, enter the row number of the parent item.
- You do not need to enter a physical location for child items — it is inherited from the parent item.
General details
-
Amount
- Enter how many identical items should be created on one row.
- Example: 10 → creates 10 identical items.
- Empty → default is 1 item.
- If using serial numbers or other unique identifiers, list each item on its own row.
- Enter how many identical items should be created on one row.
- Item Description
- Information specific to an individual item. Visible only on that item.
- Model Description
- Saved on the model level → applies to all items of the same model, including existing and future ones.
- Reservability
- YES = item can be booked
- NO = item cannot be booked.
- Barcode
- If the item already has a unique identifier (other than a serial number), you can record it here.
- Not enabled by default.
- Tags
- Add nicknames or other identifiers in the item tags or model tags columns.
- Tags make items easier to find in searches.
- Not enabled by default.
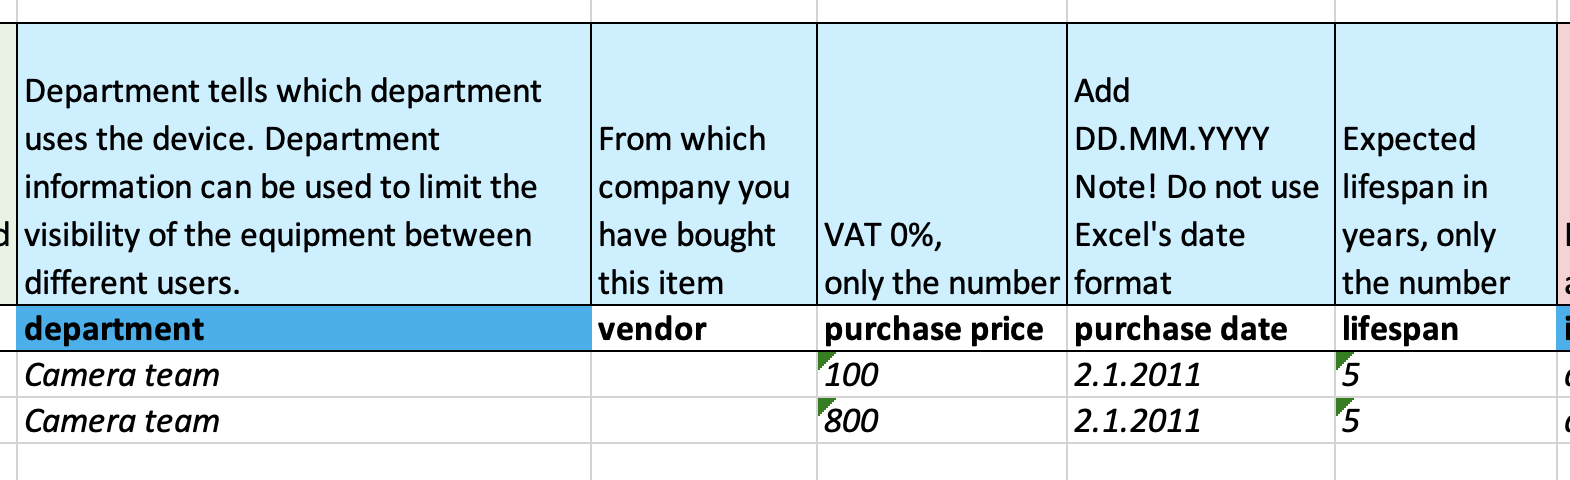
Cost Information
- Vendor
- Name of the vendor if known
- Purchase Price
- Enter the net price (VAT 0%).
- Example: 100 (the currency is shown automatically in Trail).
- Purchase Date
- Enter the date in format dd.mm.yyyy
- Example: 20.10.2025
- If only the year is known, you can add for example January 1st of that year (e.g. 01.01.2025 ).
- Do not use Excel date formatting!
- Estimated Lifetime
- Enter the expected lifetime in years.
- Example: 5
- If purchase date, estimated lifetime, and renewal price are entered, Trail automatically calculates the estimated renewal date and investment forecast for the next 10 years.
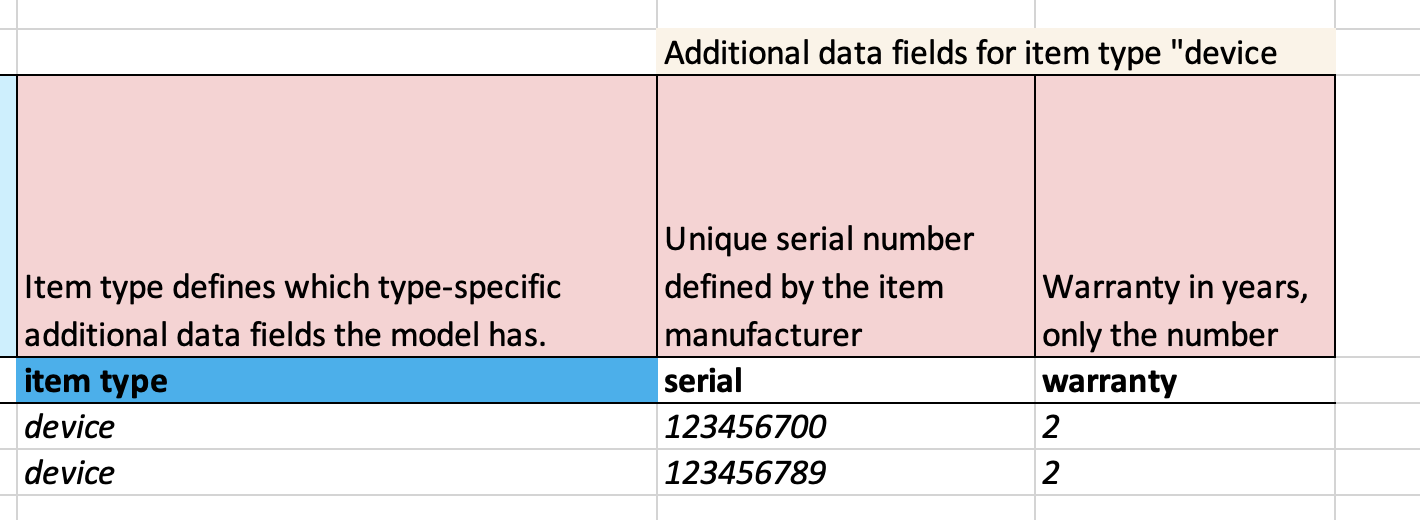
Type–Specific Detail Fields
- Item Type
- Defines which additional data fields are available. Use only existing item types.
- Most common: Item (device) — shows serial number and warranty period.
- To view other item type fields, open a similar item’s detail view or check the “create new item” view in Trail.
- Serial Number
- If used, list each item on its own row so serial numbers can be stored individually.
- Warranty
- Enter warranty duration in years.
⭐ Tips for Excel Import:
- Always save your Excel file as .xlsx before importing.
- Double-check that all mandatory (blue) fields are filled in.
- Use clear and consistent naming (e.g. “Laptops” vs. “laptop” — choose one and stick to it).