
Driving journals
The driving journals -module makes it possible to create a driving journals showing the use of the vehicle with the following information:
- the vehicle used to make the journey
- the start and end date and time of the journey
- odometer readings at the beginning and end of the journey
- the purpose of the journey made
- driver of the vehicle
- GPS coordinates of the position of the vehicle at the start and end of the journey
You can create a driving journals via the Trail mobile app, which you can download to your mobile device via the following links:
iOS: https://itunes.apple.com/us/app/trail-asset-management/id549967195?mt=8
Android: https://play.google.com/store/apps/details?id=fi.trail.trail&hl=fi
Alternatively, you can search your app store for: Trail Asset Management
The Driving Journals- module is a paid add-on feature, so if you are interested in implementing it, please contact our sales team at sales@trail.fi and we will be happy to tell you more.
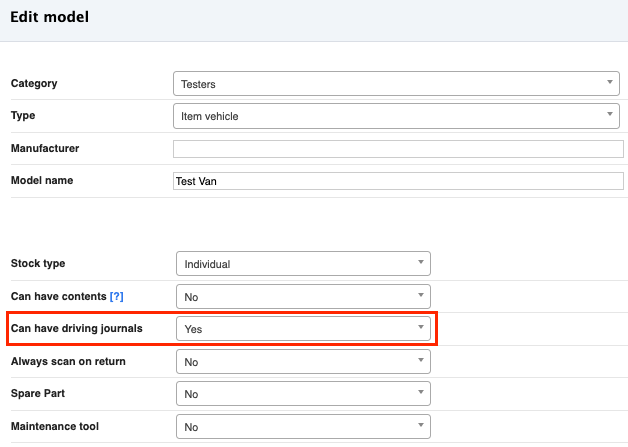
Creating vehicle for driving journal
Vehicles that use driving journals can be defined in the browser version of Trail in the vehicle's model information, by selecting "Yes" in the "Can have driving journals" field.
This selection can be made when creating a new model or edited afterwards.
Adding a vehicle to the driving journal
To start a driving journal for your journey, you first need to search for the vehicle you want to use in the Trail application. This can be done either by scanning the QR code on the vehicle, or if the label is missing, you can manually retrieve the vehicle from the system.
Search by label
Click on the barcode icon in the top right corner of the home page of the app, which opens the phone's camera to read the QR code, which unlocks the vehicle's device card directly

Manual search
Click on the menu icon in the top left corner of the app home page

Select "Items"
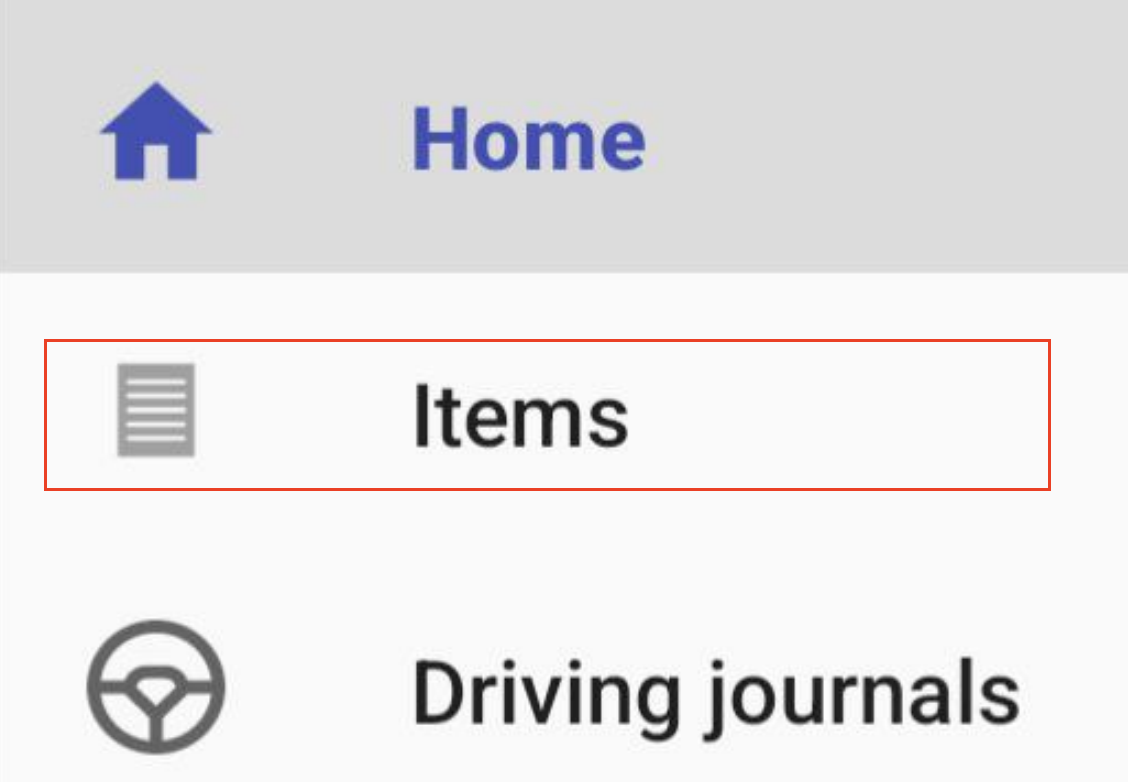
In the search field, enter the search information corresponding to your vehicle, e.g. car model or registration number

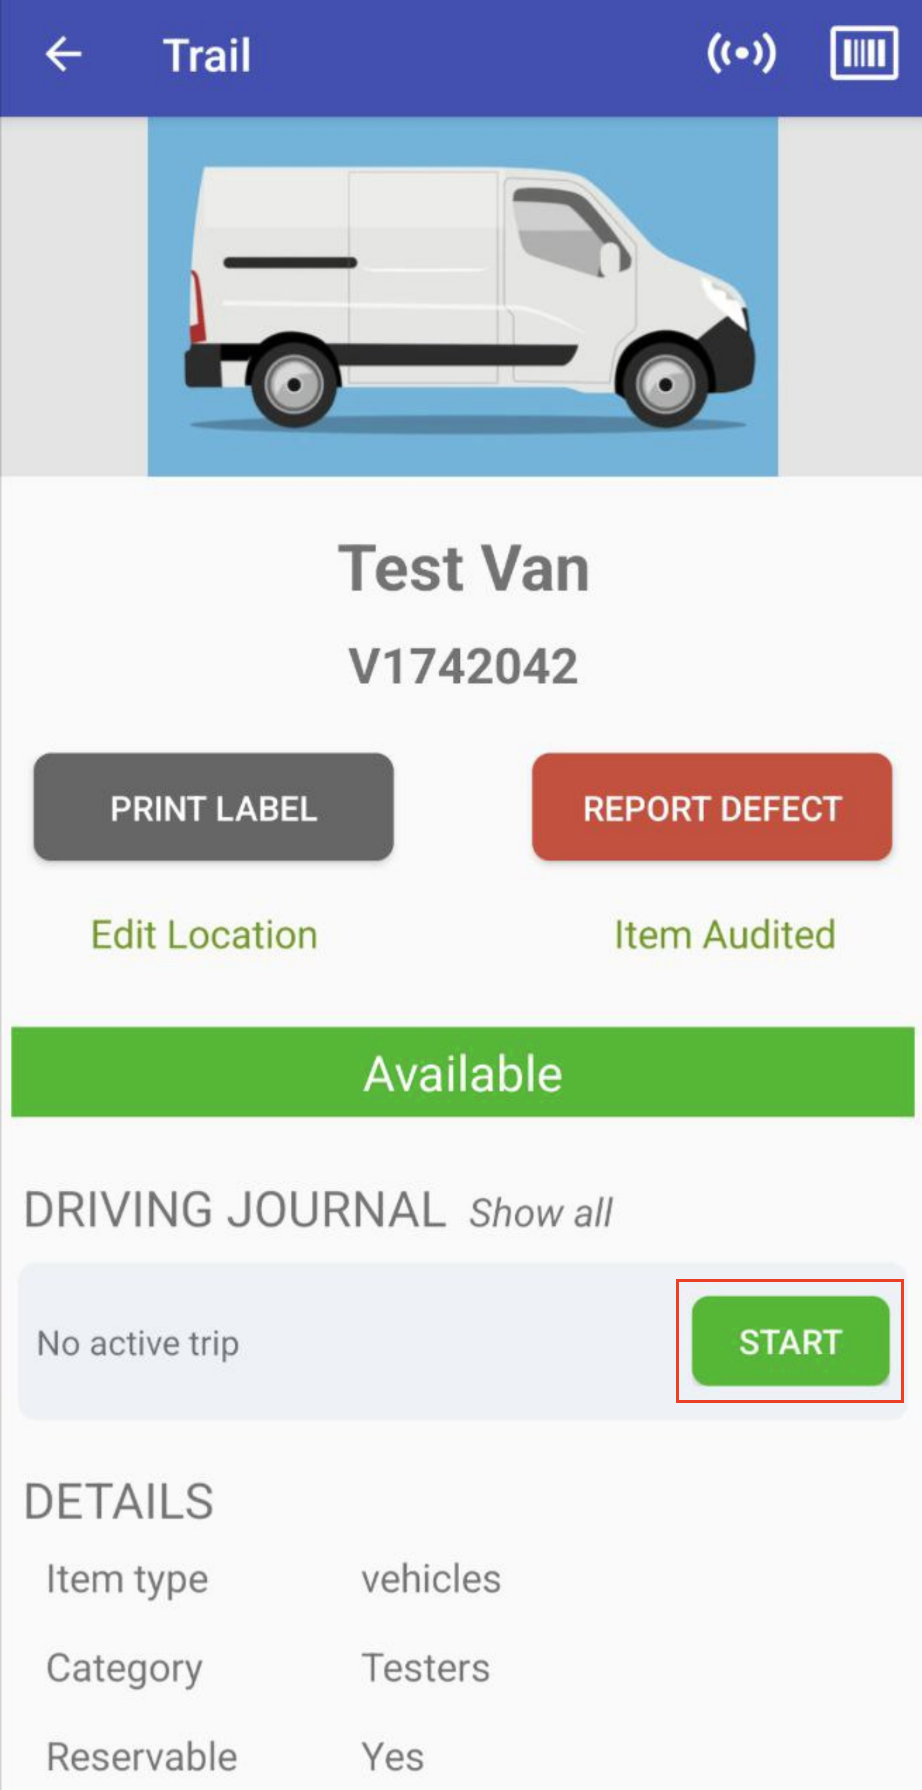
Driving journal view
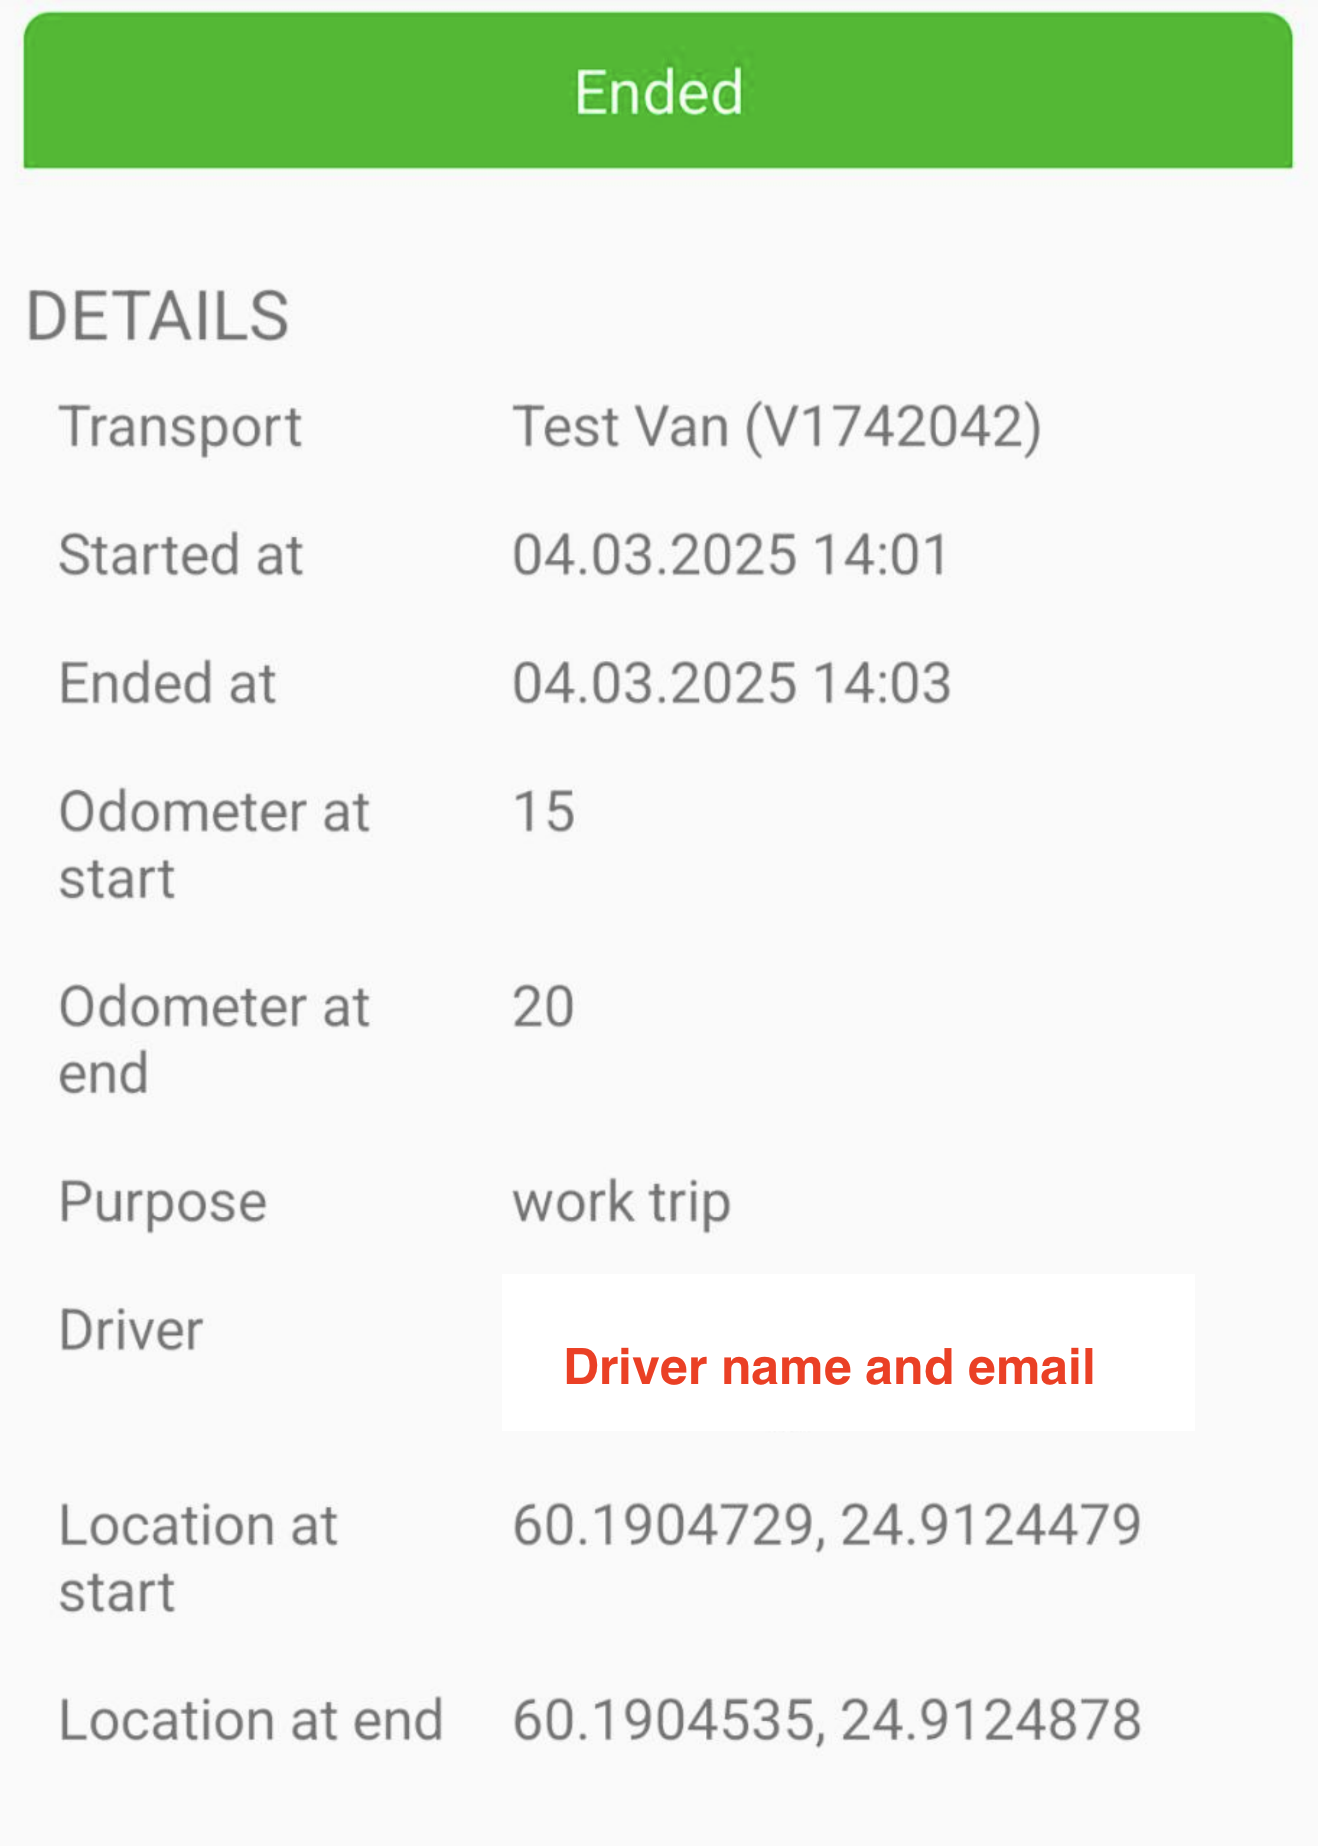
Once you have found your vehicle, the vehicle's item card will open. From the item card, you can see the vehicle details in more detail and you can view the driving journal entries next to the DRIVING JOURNAL by clicking on "Show all", which will show you the trips previously made with that vehicle. To the left of the "Start" button, you can see whether the vehicle is running or not. Click on the "Start" button to start the driving journal for the vehicle.
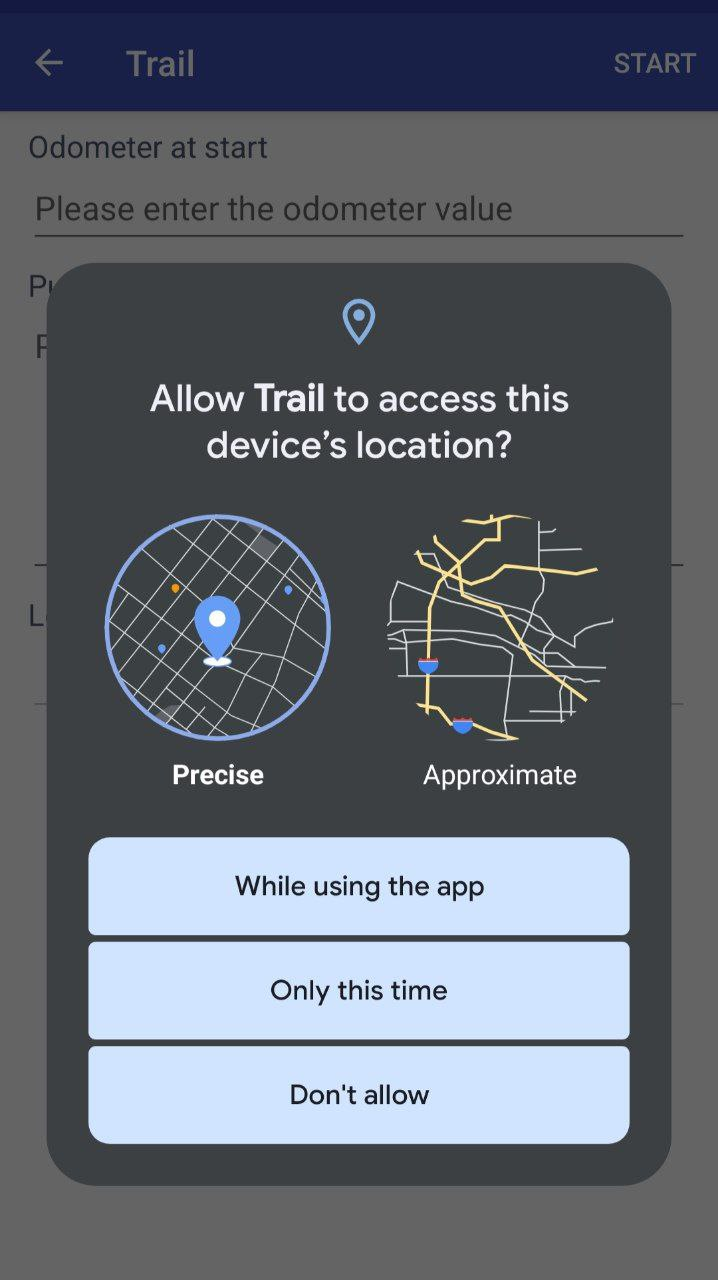
Access to device's location
In order for the Trail to record the start and end coordinates of a journey in the logbook, the user must allow the application to access the location of the device. If access to the location is not granted by clicking "Don't allow", then the "location at start" and "location in the end" fields will be left blank.
- Precise: helps you pinpoint your location as accurately as possible (recommended setting)
- Approximate: defines your location more broadly
- While using the app: gives the Trail app permission for the location of your device, and the app will not ask for it again in the future - unless you explicitly change the permission information
- Only this time: authorise the location of the device to the Trail application on a one-off basis, in which case the authorisation must be given each time the location needs to be used
- Don't allow: does not authorise the location of the device
You can always make changes to device location permissions by pressing the Trail app icon at the bottom, selecting "App details" and going to "Permissions", where you will see the permissions given to the app, which can also be edited.
Starting a driving journal
(Please note that the system allows you to manage only one vehicle's driving log at a time.)
Once you have started a new driving journal by clicking "Start" on the vehicle's item card, the system will ask you to:
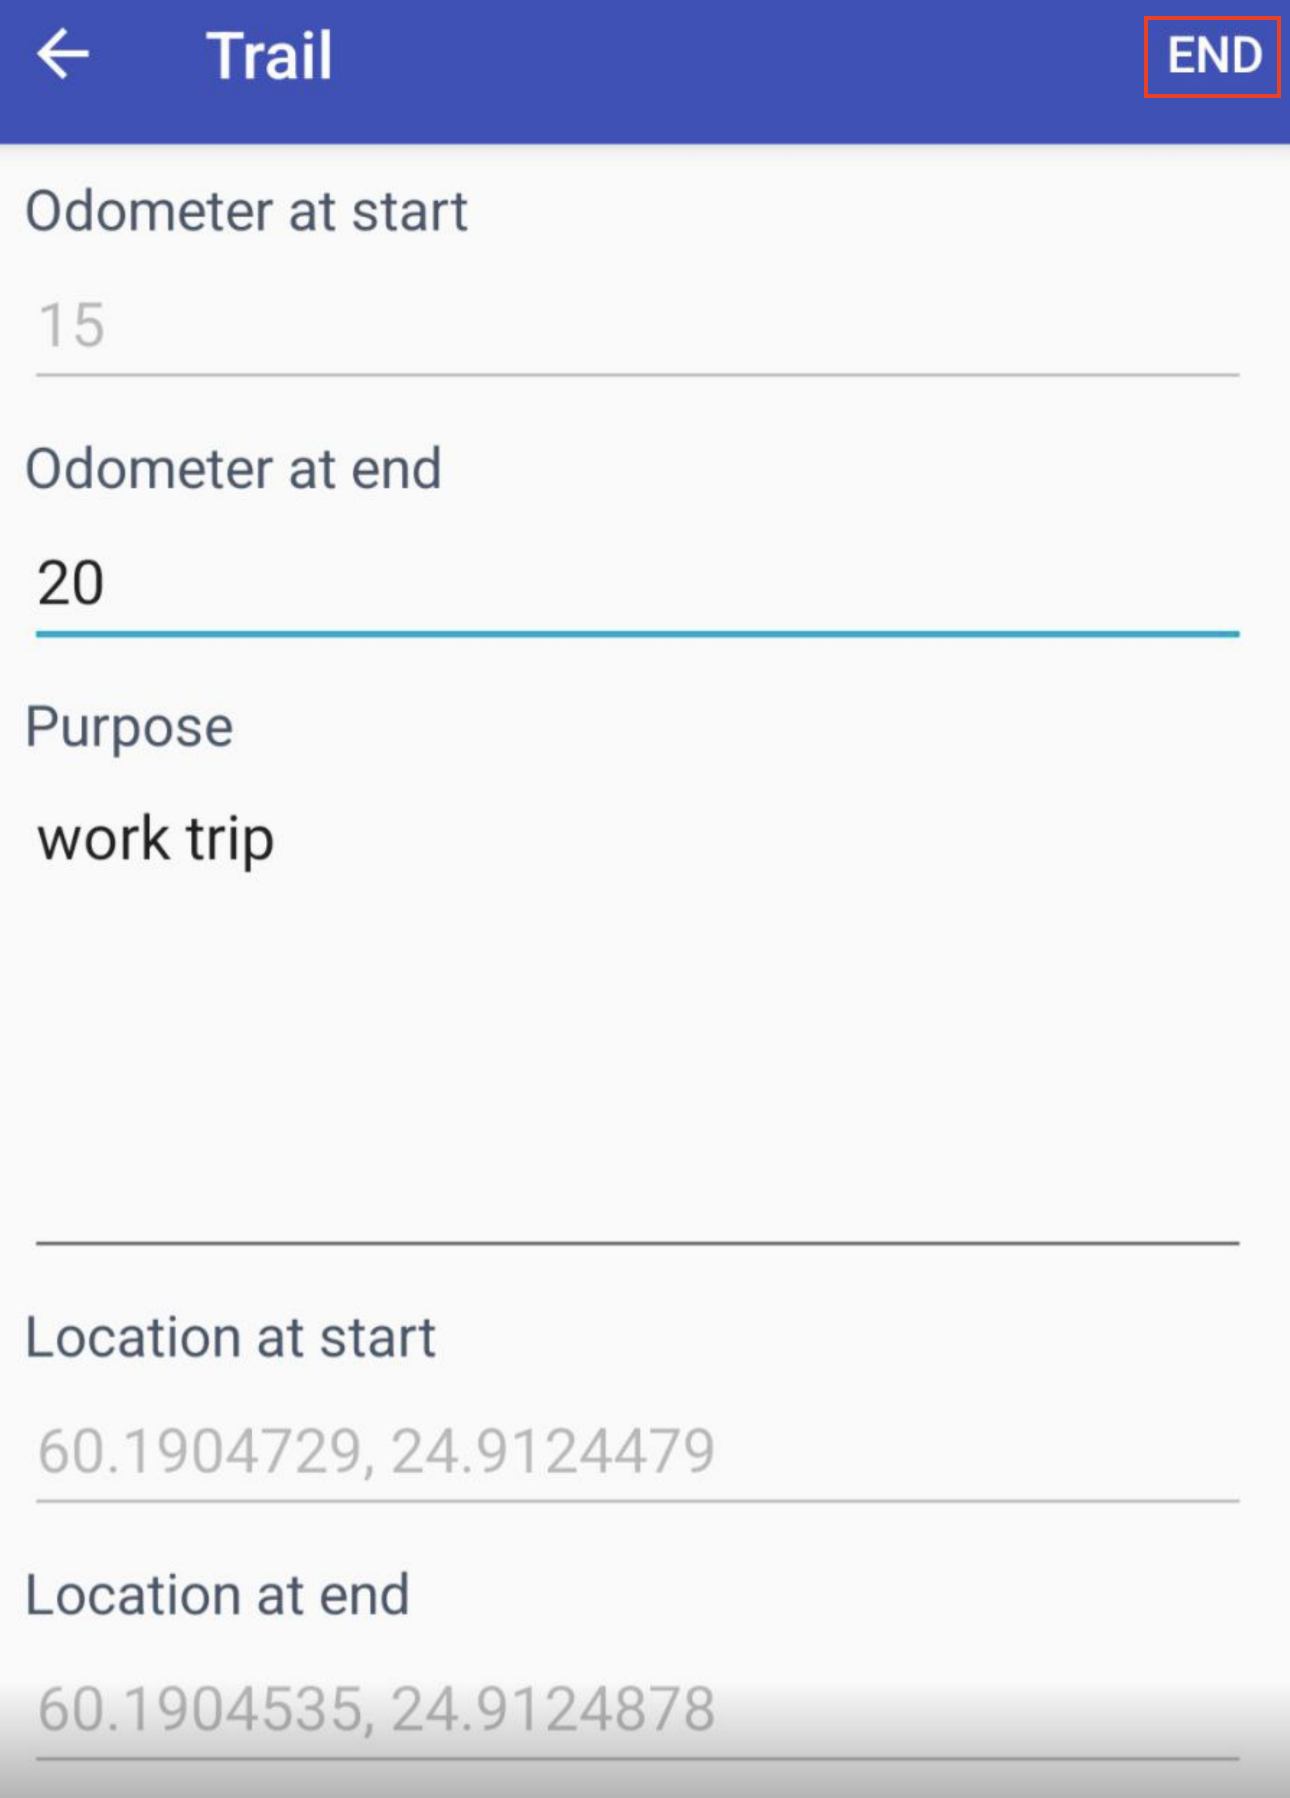
Odometer at start: Odometer reading at the start of the journey (mandatory field)
Purpose: Purpose of the trip (non-mandatory text field). For example, you can enter the reason for the trip, such as Helsinki - Rovaniemi training on-site visit
Location at start: this field is automatically filled with the GPS coordinates of the car if the location is allowed by the application. If the location is not allowed, the text "Mobile positioning not available" will appear in the field and this information will be stored in the driving journal's log.
Once the necessary fields have been filled in, the driving journal can be activated by clicking on the "Start" button in the top right-hand corner and the system will then return to the vehicle's item card, its status will change to "In progress" and the number field next to it will measure the duration of the journey in progress.

Finishing driving journal
When a trip is completed, you can stop the associated driving journal by clicking "End" on the vehicle's item card. Depending on the location rights you have given, the Trail will either ask for them again, or act on the rights previously given, thus filling in the Location at the start/end fields accordingly.

Finally, the vehicle's "Odometer at end" value must be set in the appropriate (mandatory) field.
You can also enter the purpose of the journey in the logbook at this point. Finally, click on the "End" button in the top right-hand corner and the logbook is complete.
Viewing and managing driving journals
The driving journal can be accessed by clicking on the menu icon in the top left corner of the application and selecting "Driving journals"

A user with write access can change the "logs" information if necessary, or softly delete the entry, for example after testing. These settings can be opened in the upper right corner of the image below.
Managing driving logs via browser
Driving logs can be found under the "Items" module.
User with reader rights can view their own driving log entries or upload them to Excel individually or in bulk from point 1.
User with editor rights can view all the made driving logs, upload them to Excel or delete them (point 5.)
1.Download all driving logs: This allows you to download all driving logs to an Excel file. You can also select individual driving logs to download by clicking on the boxes below
2.Toggle density: Possibility to compress the driving log view, so that more entries are visible at once
3.Show / hide columns: Here you can choose which columns the driving logs display (Status, Device, etc.)
4.Full screen: Enlarges the view
5.Delete: Possibility to delete a driving log entry softly (only for write access users)

Through the advanced search, it is possible to search needed drives, such as show rides for a specific car. Please note that you can also save your own favorite searches if you wish.

Driving journal in item card
- Driving journals section - Vehicle's driving journal history can is visible on the vehicle's item card under its' own section.
- Note! Users with reader rights to driving journals can only see their own trips.
- Odometer field - There will be an option to get "Odometer" field to item card. The field will be automatically updated after a new drive has been ended. It can also be edited from item's edit view.
- If you are interested in this feature, you can contact Trail's support team support@trail.fi
