
Location-based reservations
What are location-based reservations? It is an additional setting. When this feature is enabled:
- The system shows available equipment by location.
- Items must be read out from the same location from which it was reserved.
Topics:
Creating a new reservation
- Open Reservations – All reservations
- Click New reservation
- Fill in the basic details:
- Title – a descriptive name for the reservation
- Start – when the usage begins
- End – when the equipment will be returned
- Choose one of the following:
- Create and add items – if you want to continue planning models and quantities
- Create – if you only want to create the reservation

Planning items for a reservation
- Open the Add items view
- Enter the desired quantity on the left side
The model list shows how many items are available for the selected time period in each location (displayed by sub-locations). If an item does not have a location assigned, it will not appear in the list.
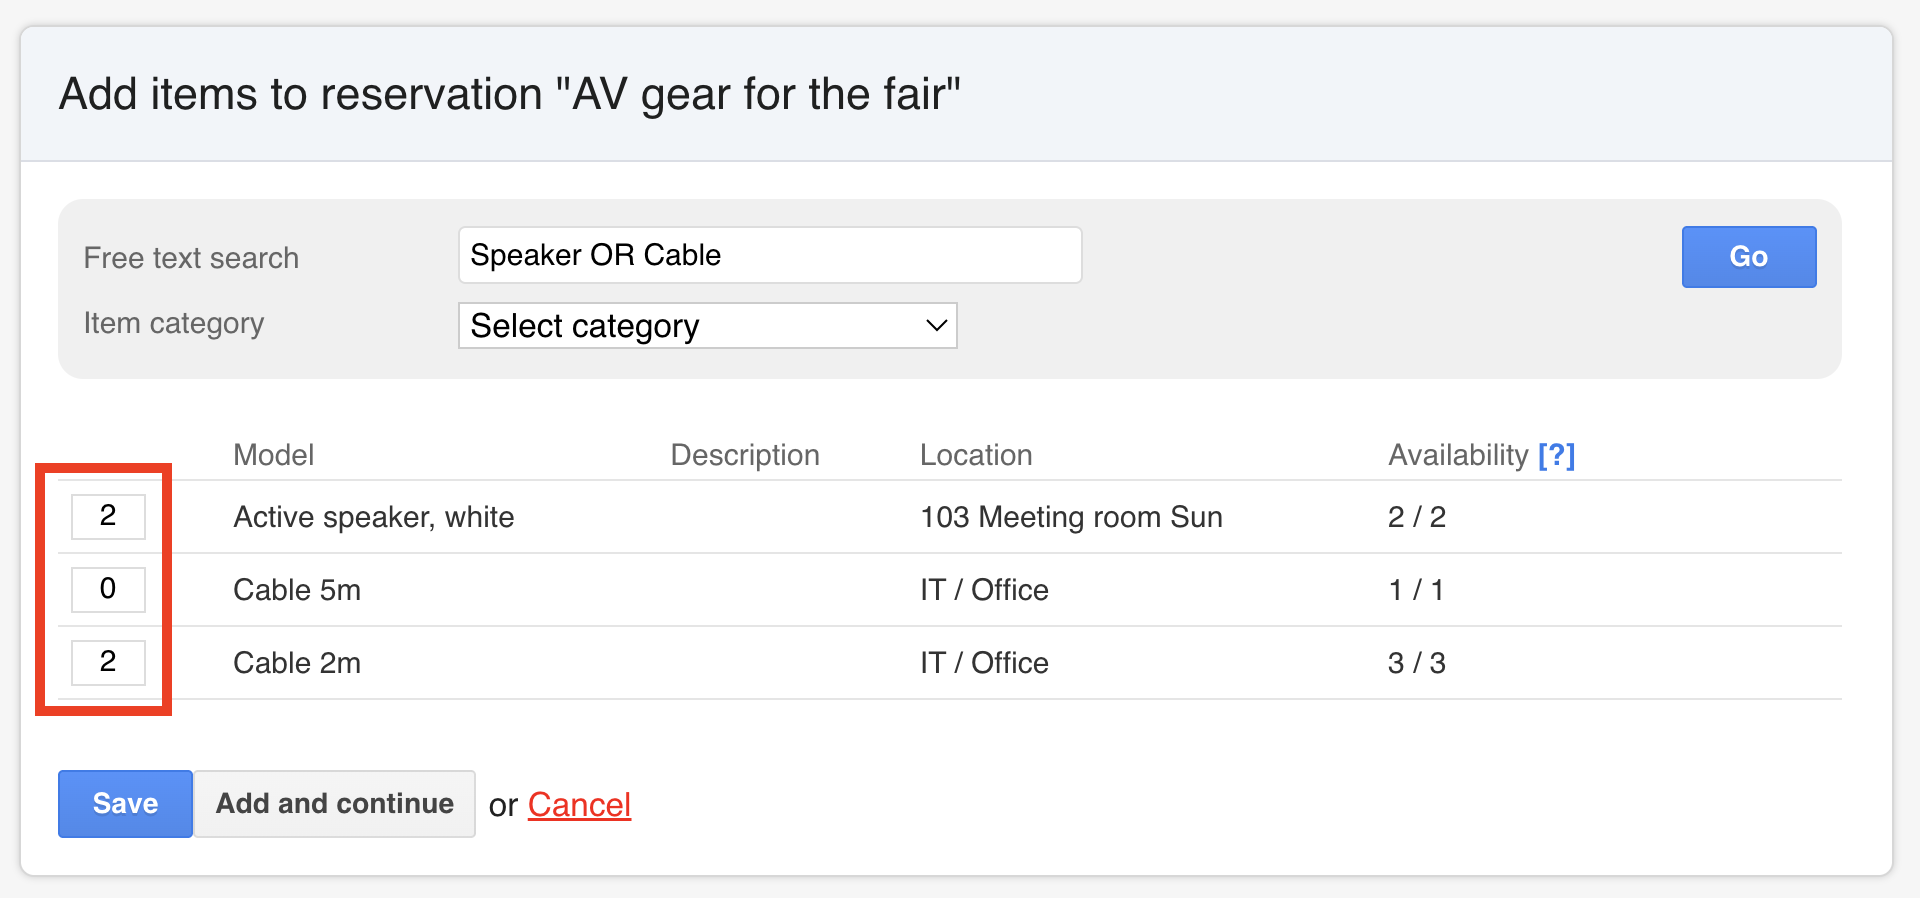
- Click Save
- In the reservation view, you can see your reservation plan.
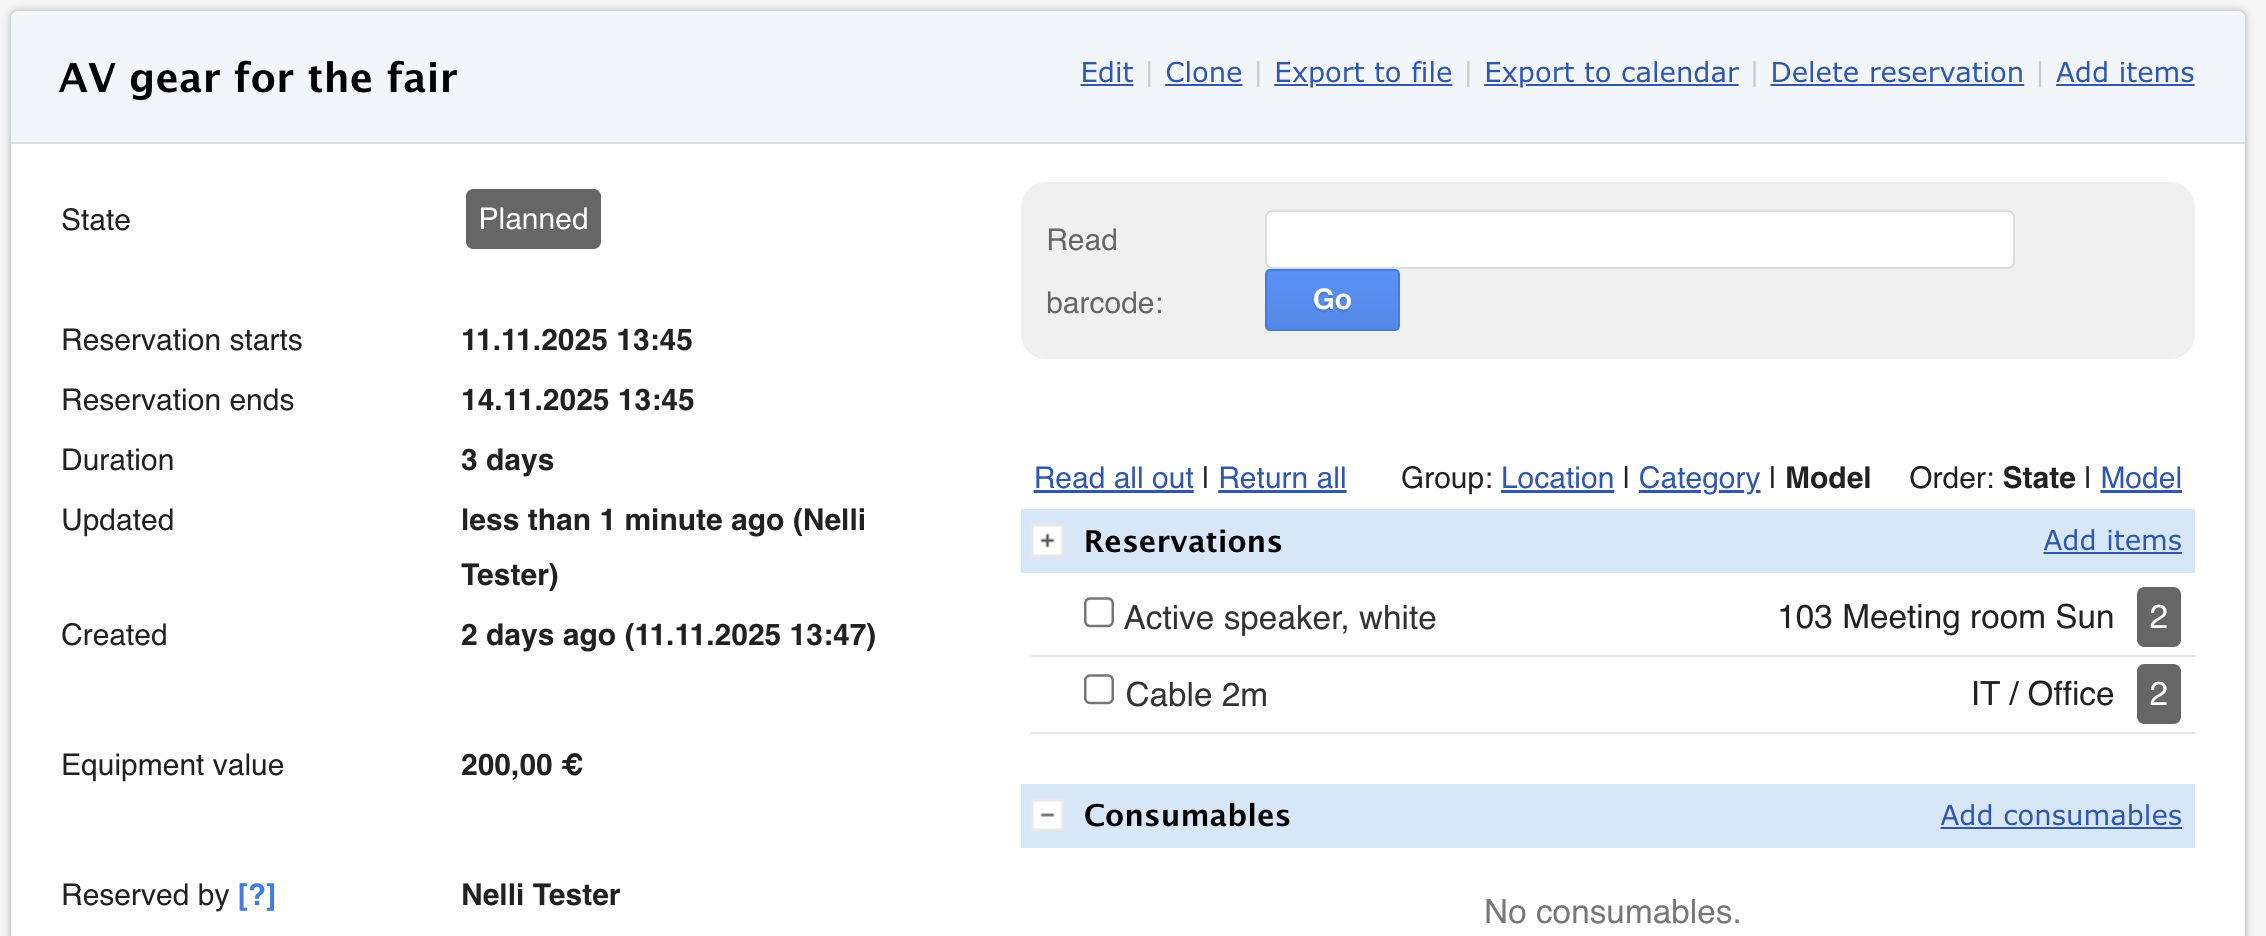
Items read out and return
- Read out
- Check the required quantities and collect them from the location from which the plan was made.
- Scan the item's QR code or enter identifier manually.
- Click Enter/Go.
- The device will be read out.
- Return
- Scan the item's QR code or enter identifier manually.
- Click Enter/Go.
- Returned items appear in green.
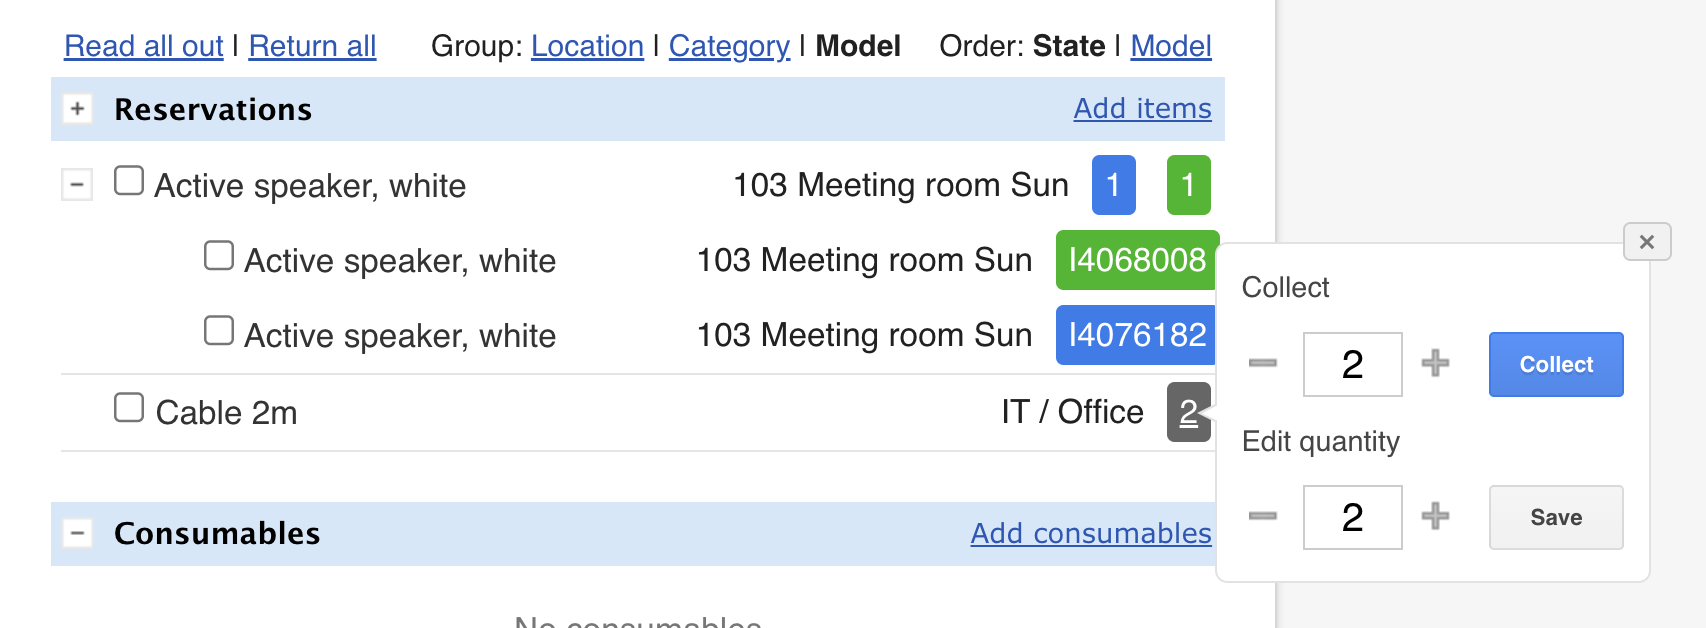
⚪ Grey = planned, not yet read out 🔵 Blue = read out 🟢 Green = returned

⭐ Tips for scanning stock models
We recommend primarily scanning items individually to avoid errors. Because stock models have one shared identifier, it is also possible to read out and return items all at once or in parts if needed.
How to do it:
- Click the model quantity
- Select the desired quantity
- Click Collect, Save, or Return, depending on the stage
⭐ Trail note
Location-based reservations help distribute item availability at the location level. However, please note that location-based reservations are not designed to be used together with the following settings:
- Reserve item contents separately – Allows to plan from main items' models. The contents become visible under the main item when the main item is read out.
- Reservation sets – A location cannot be defined when creating a reservation set or when adding it to a reservation.
- Sales add-on feature