
Setting Up the RFID Reader
This guide walks you through setting up the handheld RFID and barcode reader step by step.
The device is designed for location-based inventories in Trail and also supports reading 1D and 2D barcodes.
If you're interested in purchasing a reader or need help getting started, the Trail team is happy to help. Contact us at sales@trail.fi
Assembling the Reader
The reader package includes the following parts: an AsLock mount for the iOS device, an AsReader case (model-specific), and the AsReader reader. You'll also need a compatible iPhone and a compatible charger.
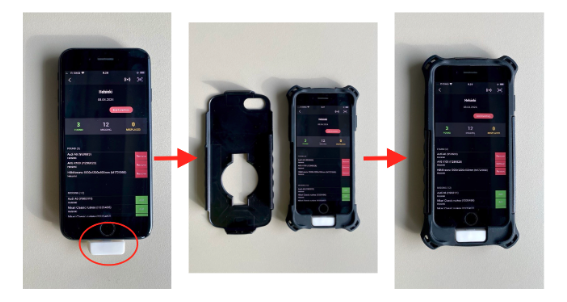
1. Placing the iPhone in the case
- Place the iPhone in the AsLock mount.
- Then insert the iPhone into the soft (rubber) case.
- Finally, attach the assembly to the hard (plastic) case.
- Check that:
- All parts fit tightly in place
- The phone's buttons work normally
2. Attaching the case to the reader
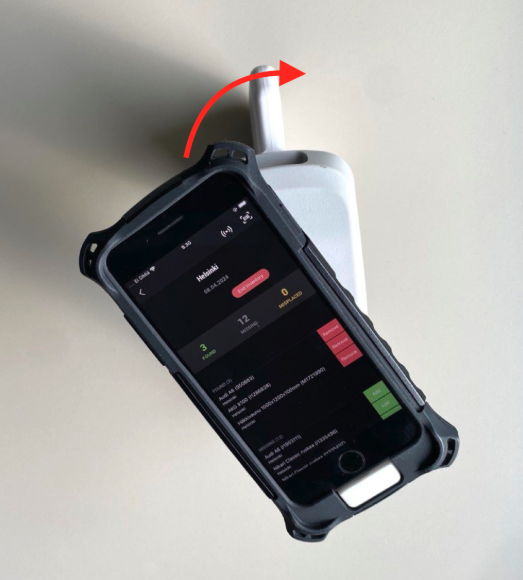
- Hold the reader so that the mounting rail is visible.
- Place the case on the reader at a slight angle relative to the reader.
- Turn the case to the right until it locks into place.
- Make sure the case is firmly attached and doesn't move.
Getting Started with the Reader
1. Charging the device
- Connect the charging cable to the USB-C port on the back of the reader.
- When the iPhone is attached to the reader, the phone charges at the same time.
- Allow enough time for charging.

2. Setting up the iPhone
- If the iPhone is new, set it up according to the device's own instructions.
- Make sure you have a working internet connection (Wi-Fi or mobile data).
3. Installing the Trail app
- Open the App Store on the iPhone.
- Search for the app: Trail Asset Management.
- Download and install the app.
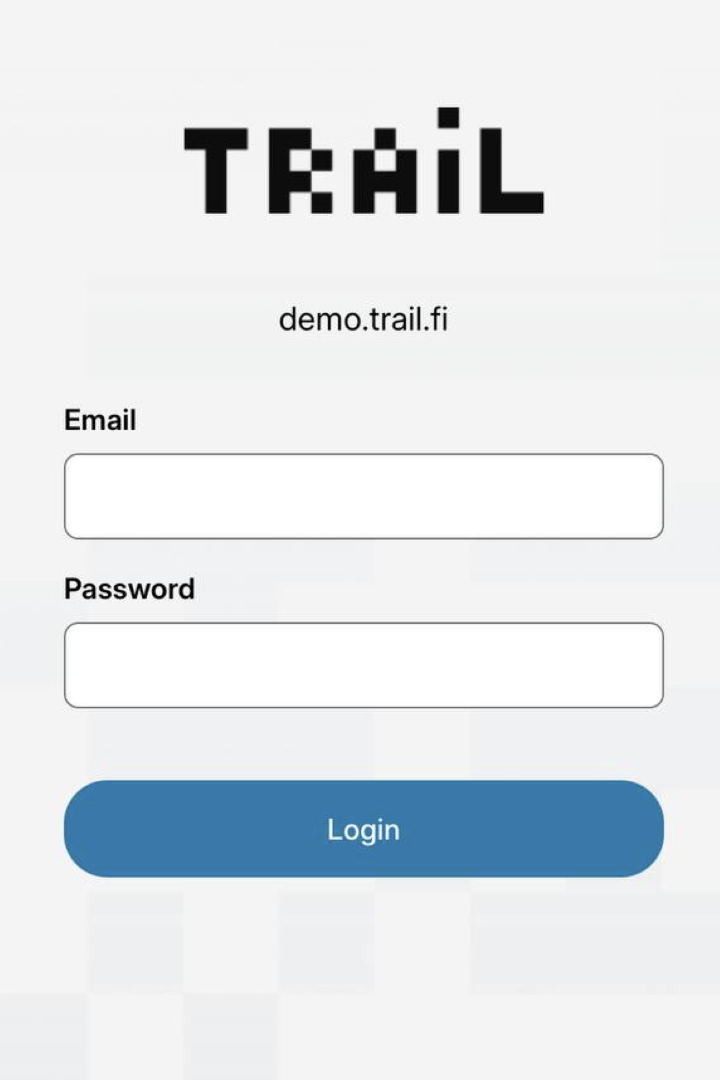
- Log in with your own credentials.
4. Testing the reader
- Open the Trail app.
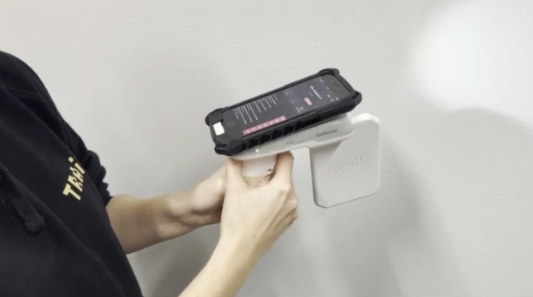
- Turn on the reader by holding down the Power button until the green light stays on steadily. A notification will appear in the Trail app confirming that the reader is connected.
- Test the reader by scanning an RFID tag or a barcode.
- Press the reader's trigger near an RFID tag and make sure the scan is registered in the app.
Adjusting RFID Settings
- Open the Trail app.
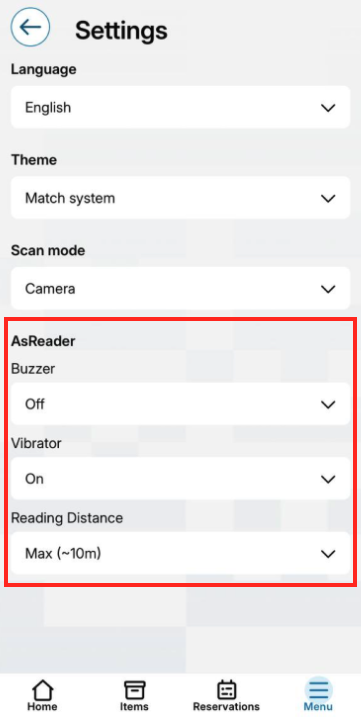
- Open the menu (top left corner) and go to Settings.
- Adjust the settings as needed:
- Buzzer (reader sound) – the volume while scanning. Options: High, Low, Off
- Vibrator – whether the device vibrates while scanning. Options: On, Off
- Reading distance – how far away tags can be read.
- Default: 10 m – suitable for warehouses, for example
- 5 m or 2 m – suitable for offices, for example
⭐ Tips
- Don't force parts into place or pull them apart forcefully – handle them with care.
- Keep the connector and contact surfaces clean to ensure reliable operation.
- If the reader doesn't respond:
- Detach and reattach the case
- Check that both the reader and the Trail app are on
- Make sure the battery is charged
- You can adjust the reader's reading distance in the Trail mobile app's settings.