
Locations
A location defines where each item can be found. In Trail, a location can be either a physical place (e.g. a room, storage area, or building) or another item.
To ensure consistency, only a limited number of users are allowed to add and edit locations in Trail.
Topics:
Example of locations
These are indicative examples to help you design your location structure. You might want to consider a location hierarchy if, for example, you have multiple buildings.
Keep names clear so that users can easily recognize them.
| Parent location | Location | Sublocation |
|---|---|---|
| Office | Meeting room 102 |
|
| Theatre street 4 | Main stage |
|
| Theatre street 4 | Lighting and sound booth |
|
| Outdoor storage | Corridor A | A-01-01-A1 (example of a shelf position) |
Creating a location
- Open Admin → Locations.
- Click New location.
- Fill in at least the location name:
- Code: Unique location code
- Example: “Meeting Room Cloud” might have the code 102 showing on its' door. If rooms are not individually named, include the room number in the location name, e.g. “Meeting Room 102”.
- Name: The name of the location (Mandatory)
- Parent location: Choose the main location this location belongs to.
- Code: Unique location code
- Click Create.
- New location has been created.
Additional fields explained below image
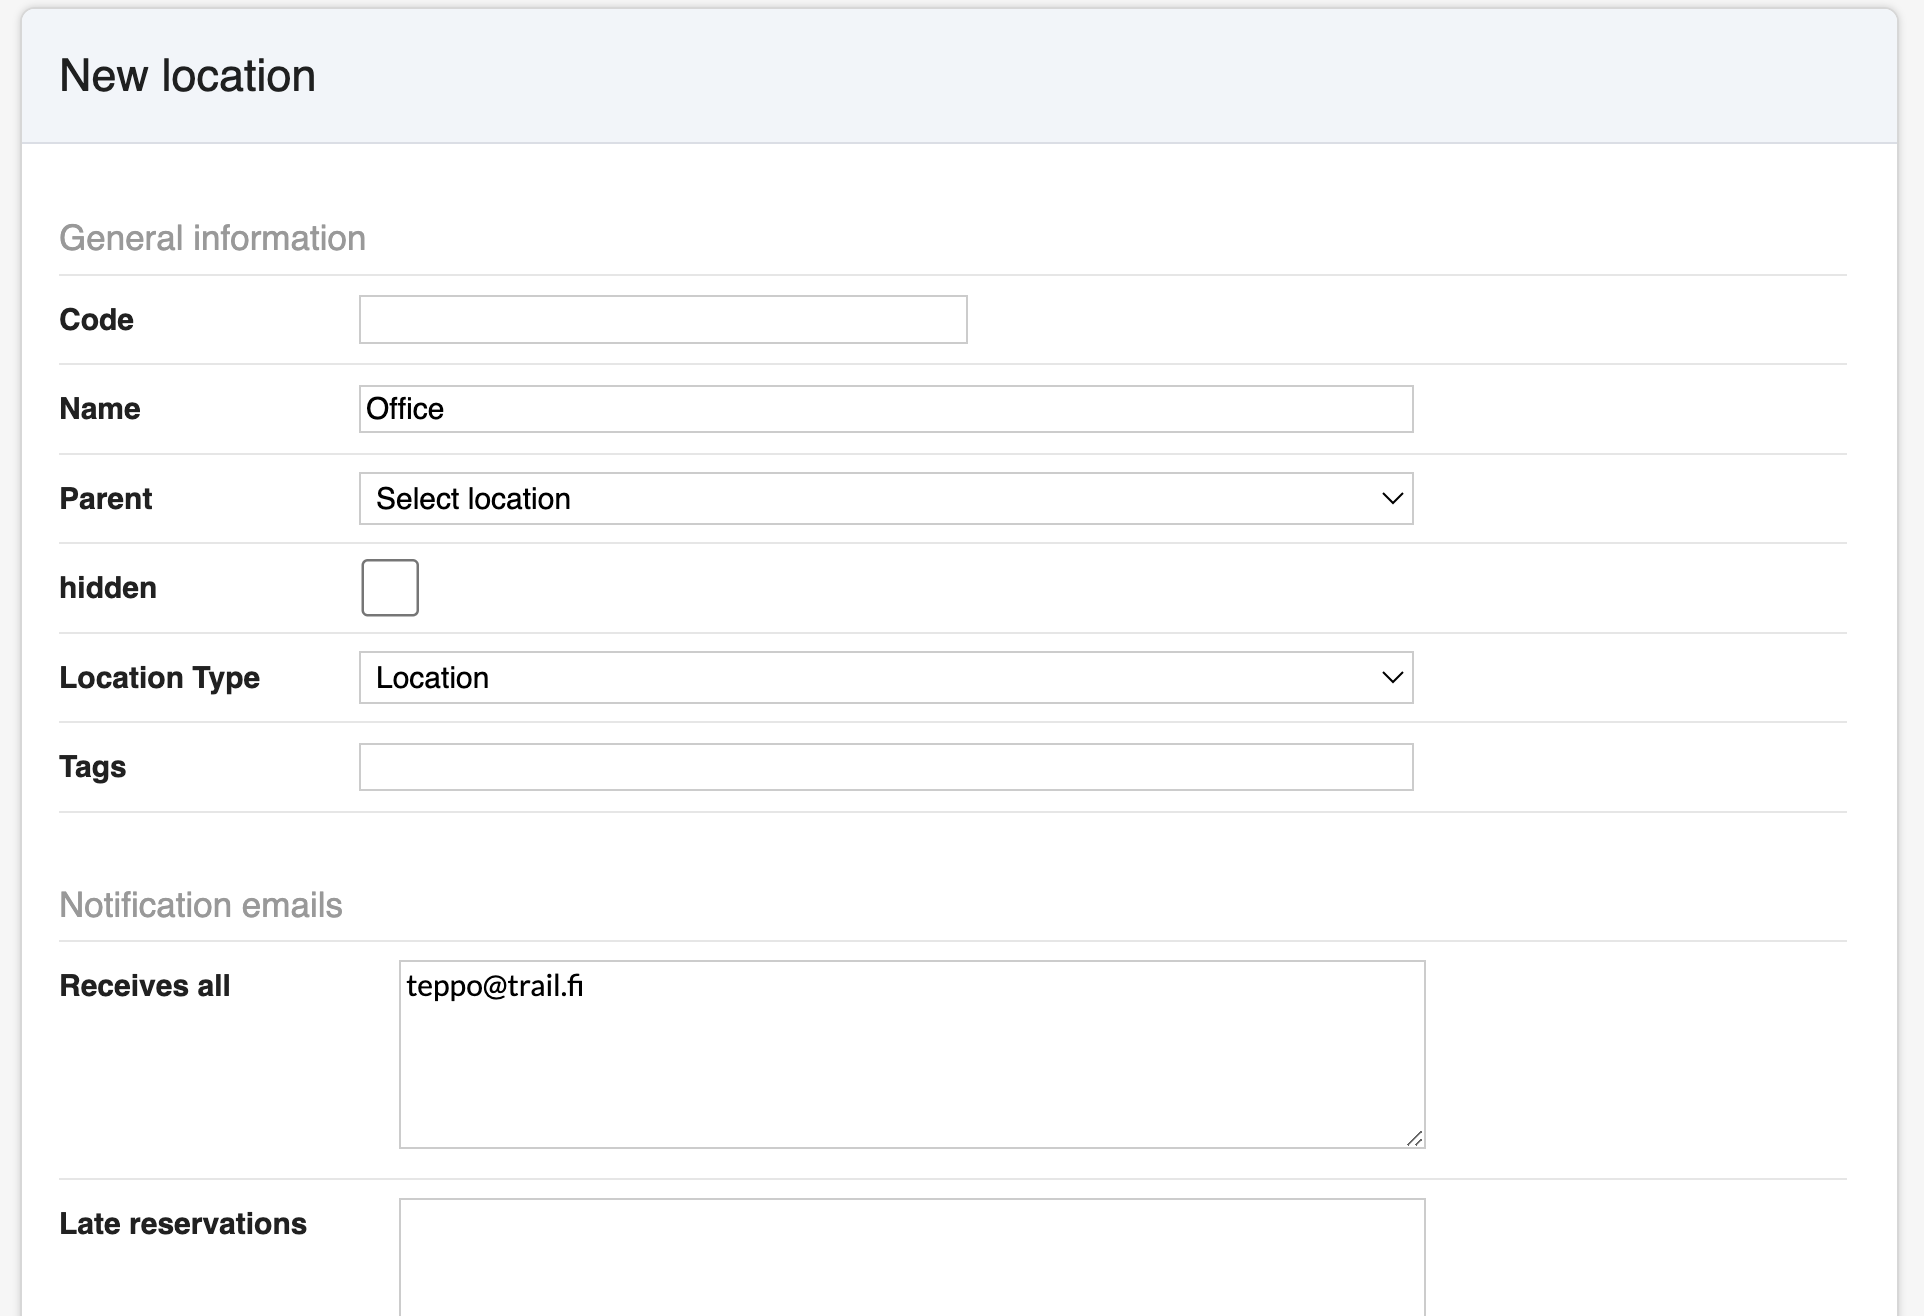
Additional fields when creating a location:
- Hidden: Temporarily hide a location to appear in searches.
- Location type: Defines what additional information fields are shown in a location’s details and may also affect certain functionalities in Trail.
- Location – Default and most commonly used option. Does not add any additional information fields.
- Storage – Allows adding size-related information and is typically used for warehouse shelves or storage areas.
- Storage status report – if your organisation uses this report, all shelves must be set to Storage to be included in the report.
- Fixture – Adds technical fields such as Fixture DMX and Relay channel. It is typically used for fixed fixture positions added as sub-locations (for example: Main Stage -> Fix 101).
- When a fixture contains only one item, the item’s name and serial number are shown in the parent location's page to help follow the current situation.
-

- Offsite storage – Used when an organisation has the Offsite storage setting enabled. This allows Trail to show a warning on the reservation page if some items need to be sourced from an offsite location. After the general setting has been added on, to enable this warning, set the parent location’s type to Offsite storage.
- Email notifications: You can route notifications about items at this location to specific email addresses. Add multiple addresses separated by commas or spaces. (More info: Notifications)
- GPS coordinates and addresses: You can add one or more addresses by clicking New address.

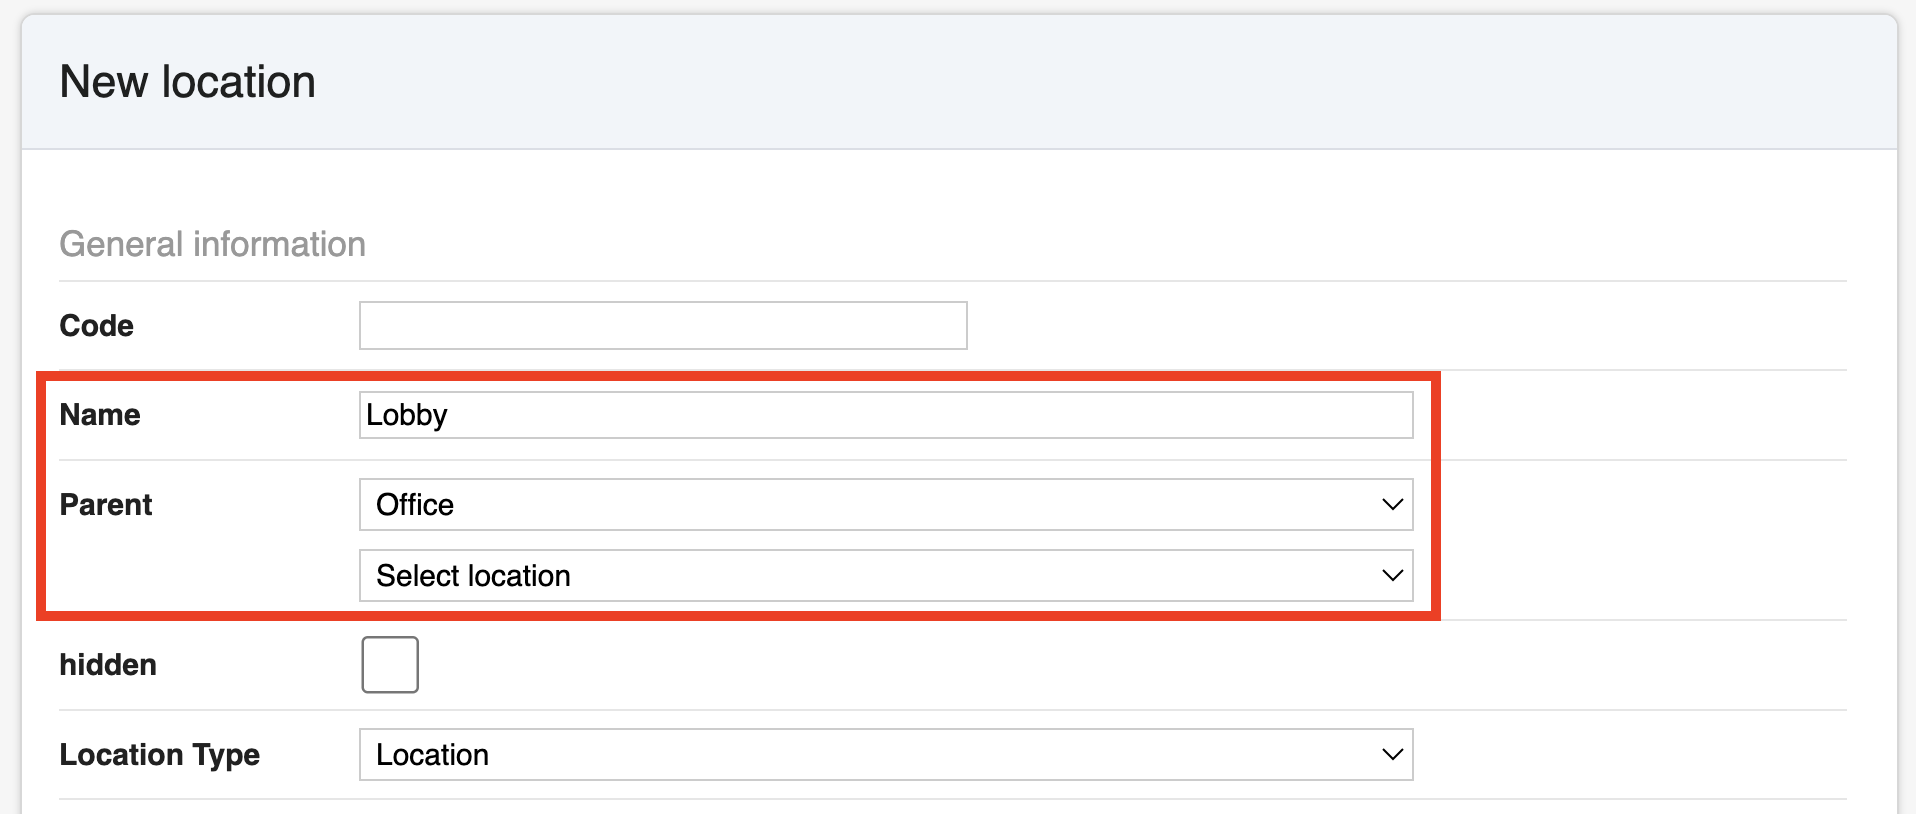
Creating a Sub-Location
Often you may want to specify location data in more detail. For example: Building 1 has multiple rooms. To reflect this structure, you can create a sub-location for a main location.
- Open Admin → Locations.
- Click New location.
- Fill in at least the following information:
- Name: Name of the more specific sub-location.
- Parent location: Choose the main location this belongs to.
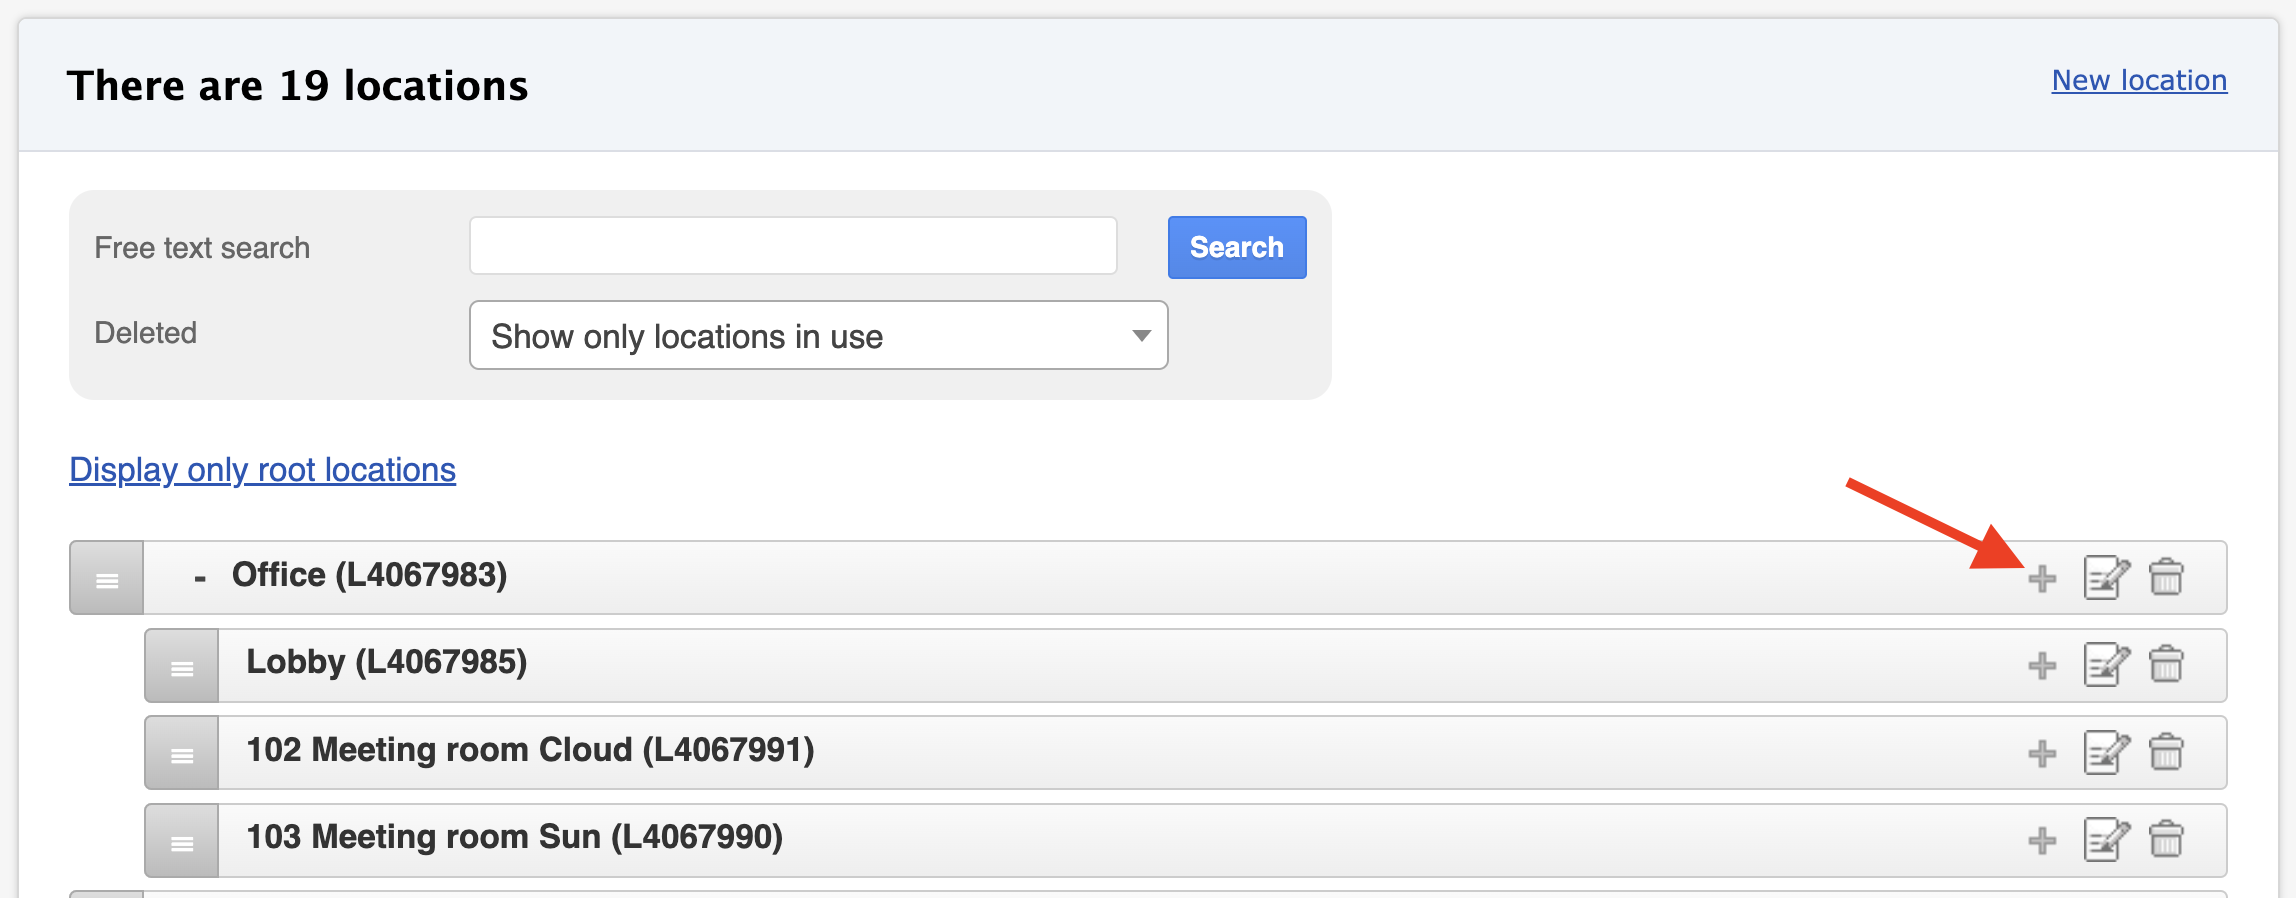
👉 Tip: Alternatively, find the main location from the list and click the + icon. The parent location will be pre-filled automatically.
- Fill in the rest of the sub-location details as when creating a new location.
- Click Create.
Location's own view
When you click the name of a location, its detail view opens. Here you can:
- Edit or delete location
- Print a label for the location (if printing is available)
- Export an Excel list of the location’s items, stock models, or consumables
- Add items by scanning a barcode into the Scan barcode field
- View the edit history (if you have the rights)

Deleting a Location
- You can delete a location in two ways:
- Click the Trash icon in the location list.
- Open the location detail view and click Delete.
- The location is first soft deleted.
- Soft-deleted locations can be found in Advanced search by selecting Deleted → Show only deleted locations.
- A soft-deleted location can be restored.
Permanent Delete
A location can only be permanently deleted if no items or sub-locations are linked to it, and it has not been assigned as the location for any maintenance task.
- After a location has been soft deleted, the Permanently delete option appears on its page.
- Once permanently deleted, the location is completely removed and cannot be restored.
