
Performing the transport (mobile)
With the Trail mobile app, you can add, read out, and return equipment for a transport.
To track a transport, you need the Trail iOS mobile app.
If you do not yet have a transport plan created, first read the guide: Creating a new transport
This article explains:
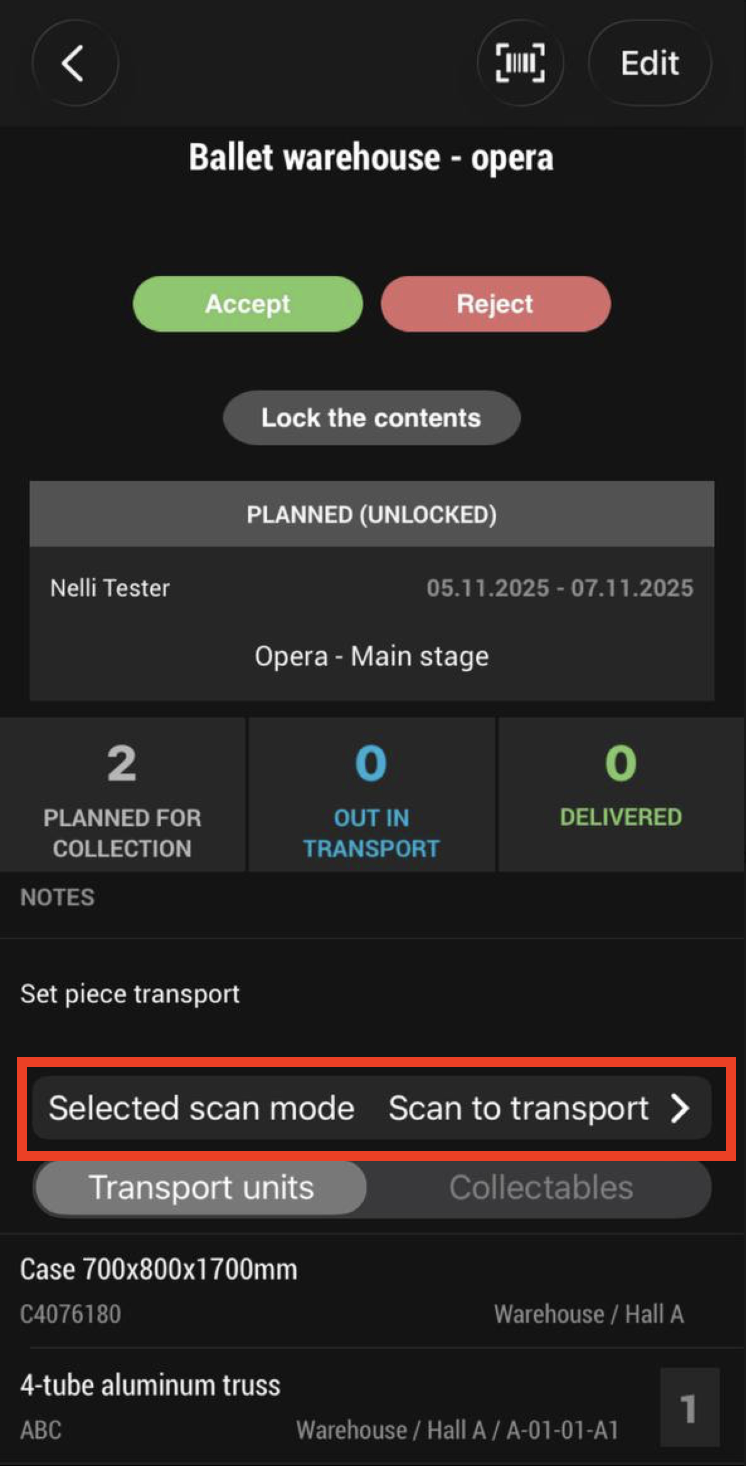
Transport view in mobile
- Log in to the Trail app (iOS)
- Open Menu - Transports
- Open the transport you want to take a closer look at

- On the transport page, you can see:
- The transport status
- Transportable items and their locations.
- Lock content - Extra setting. When the transport is locked, equipment in the transport cannot be changed.
- Note! Selected scan mode - You can choose the appropriate scanning mode depending on what you are doing:
- Scan to transport - Scan products out for transport
- Scan to plan - Plan what products should be transported
Performing the transport – step by step
1. Accept the transport plan
The transport can be accepted either in the browser or in the mobile app. Approval requires editor rights to transports.

2. Start the transport
Make sure that the Selected scan mode is set to Scan to transport.
To start transport, press Start. This can be done by a user with at least reader rights.

3. Collect the items
The collectable items are shown at the bottom of the list. If you scan the main item, e.g., a case, its content will be included in the transport.
- To scan: Press the barcode icon in the top right corner
- Scan the item's QR or barcode
- Once the product has been collected, it's amount appears in blue

4. Deliver items to the destination (scan the location)
- Press the barcode icon in the top right corner
- Scan the QR code (identifier) of the destination location
- Trail will ask for confirmation → choose Yes
- The items' locations will automatically update to the new destination

-
End transport
- When the transport is finished, press End to complete it fully
⭐ Tips for successful use:
- Make sure the driver has access to the Trail iOS mobile app
- Always use QR or barcode scanning to avoid mistakes
- Agree in advance within your organization:
- Who accepts the transports
- Who performs the transports
- Whether there is a receiver at the destination to assist the driver
- Trail iOS mobile app is a great tool to perform the transport steps. If needed, Trail offers additional help for scanning with a 2D barcode scanner. To learn more, contact: sales@trail.fi
