Adding items to transport from a reservation
The Transport module allows you to easily track and execute transports in Trail. In this guide, you will learn how to add the items to transport when using reservations.
If the Transport module is not yet in use but is needed, please contact us: sales@trail.fi
Topics:
Option 1: Adding items from the transport view
This method is suitable when you want to utilise the reservation's information, but add the items to the transport manually.
- Open the reservation's own view
- Plan the necessary items for the reservation.
- Open the transport's own view (in another tab)
- Select:
- Add items - Add a specific item, or a case
- Add models - Add needed quantity, when the uniqueness does not matter.
- The reservations' items is now added to the transport.
Option 2: Adding Items from the Reservation view
This is suitable when you want to transfer the items directly via the reservation.
Note! For items to be added to the transport from the reservation view, reservation must have individual items (not models). For this reason, items need to be planned in item level, or be read out before adding them to transport.
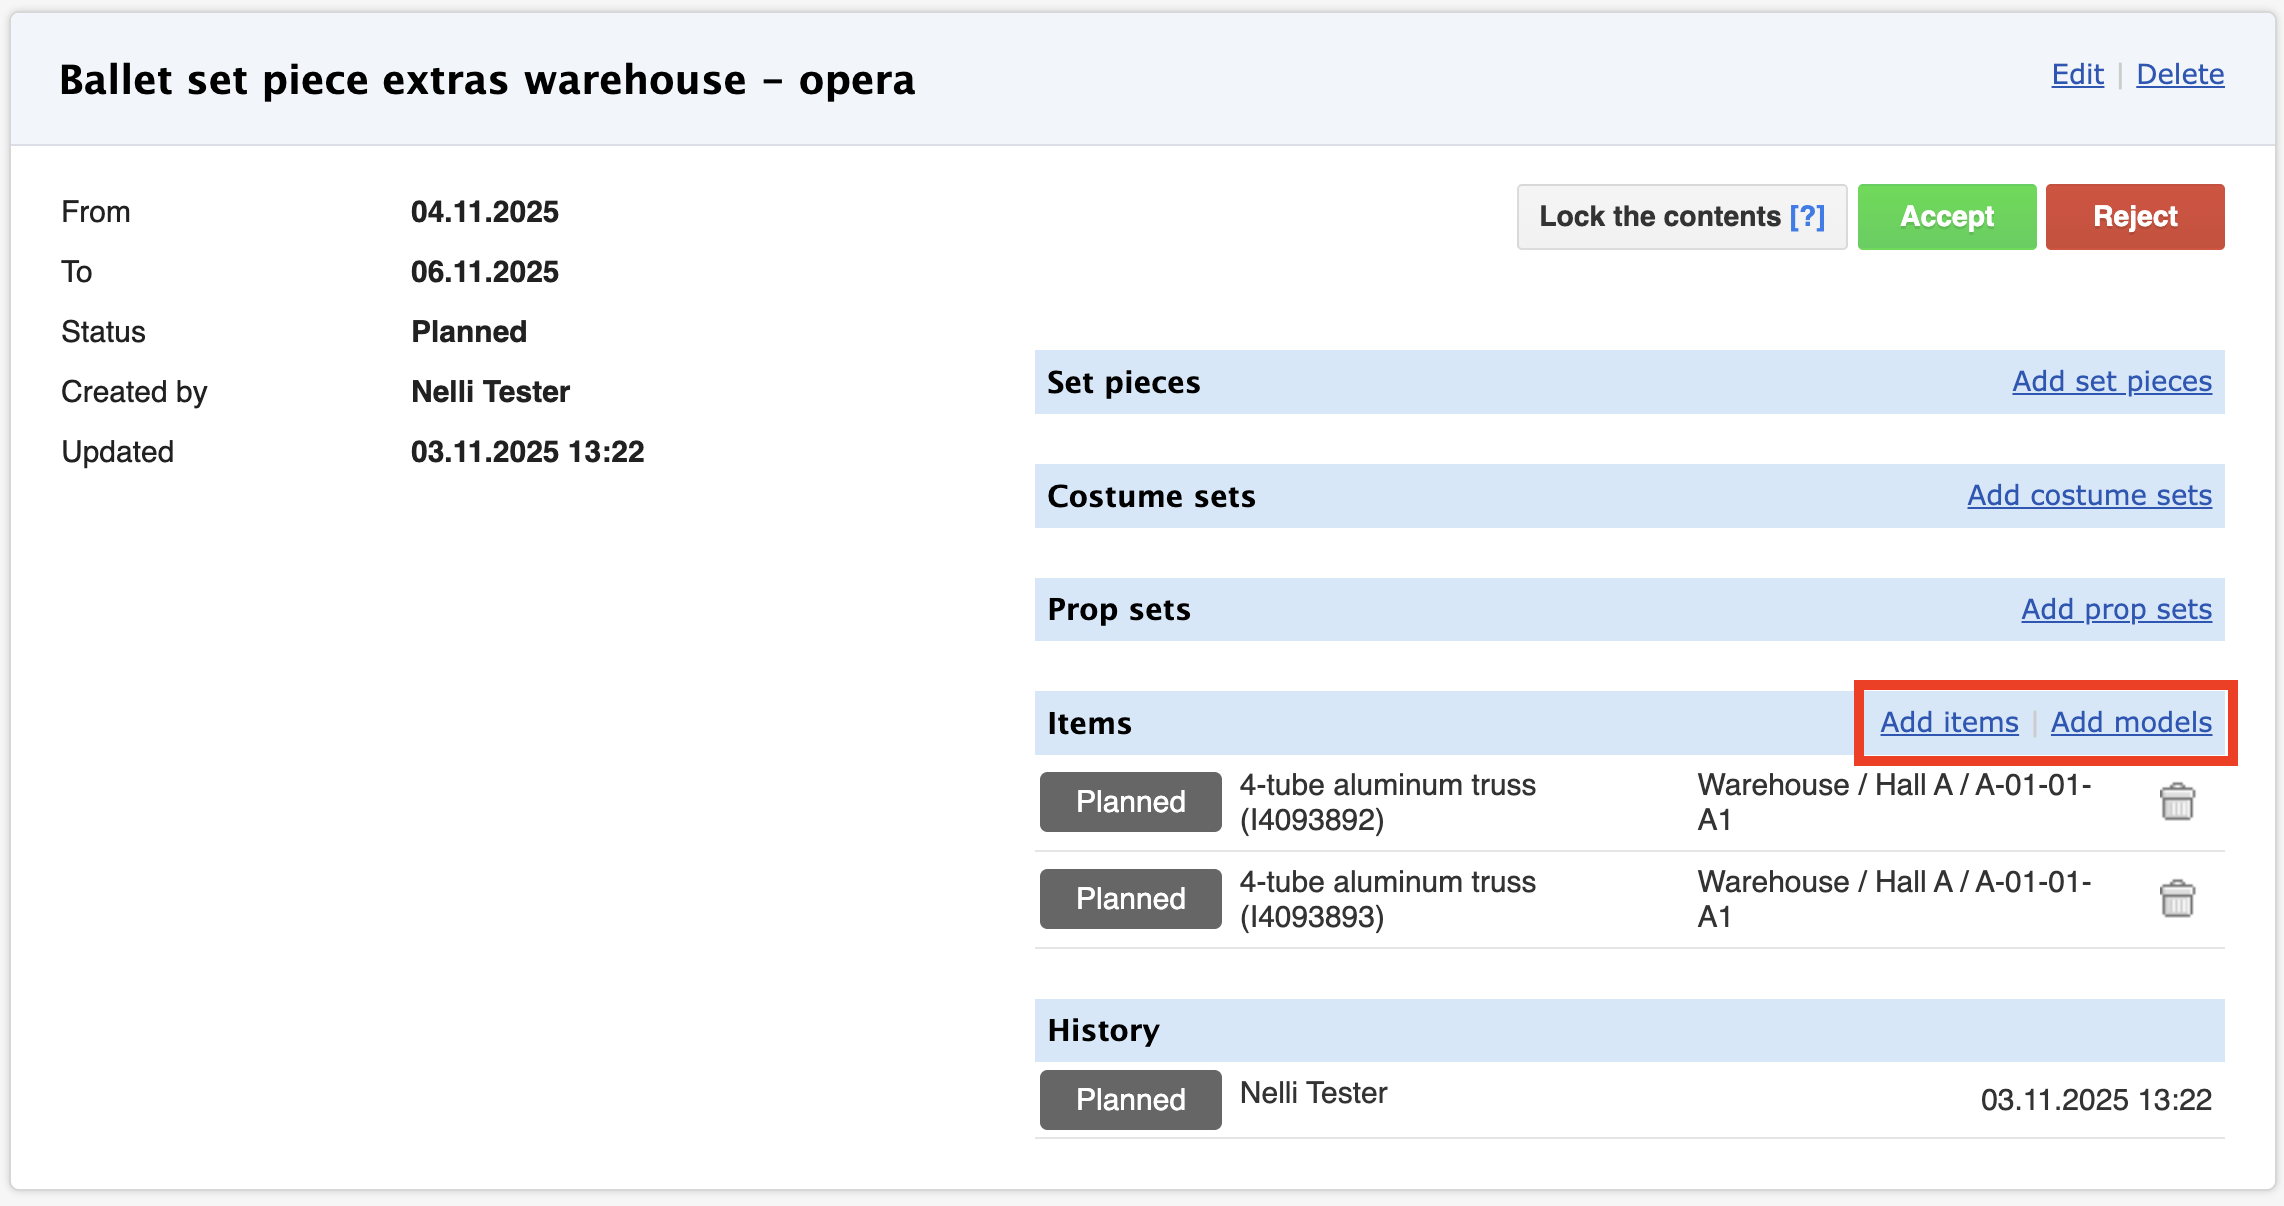
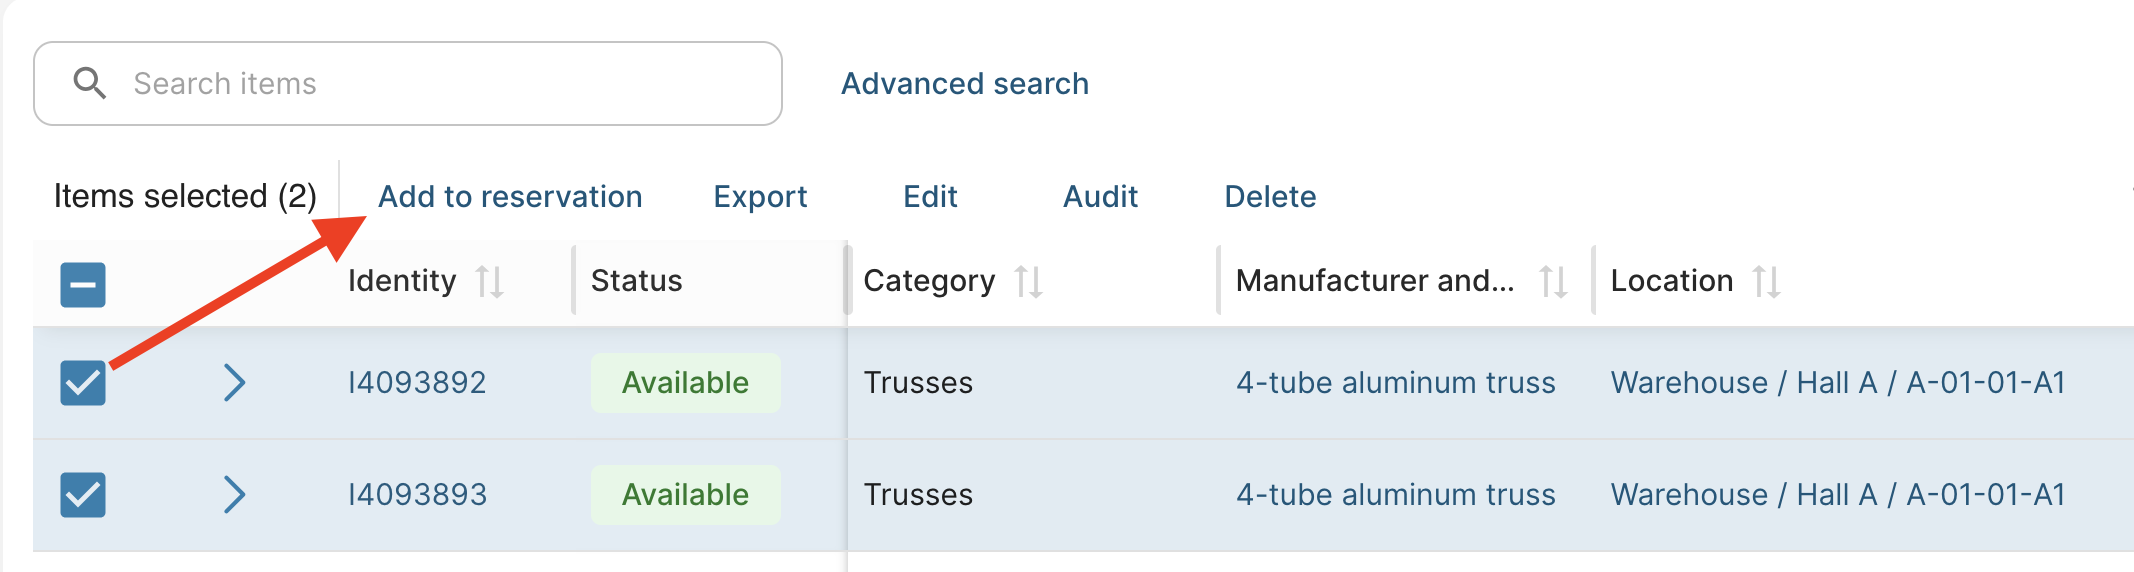
- Open Items - All items
- Select the items
- Click Add to reservation
- Select the reservation to which the items belong.
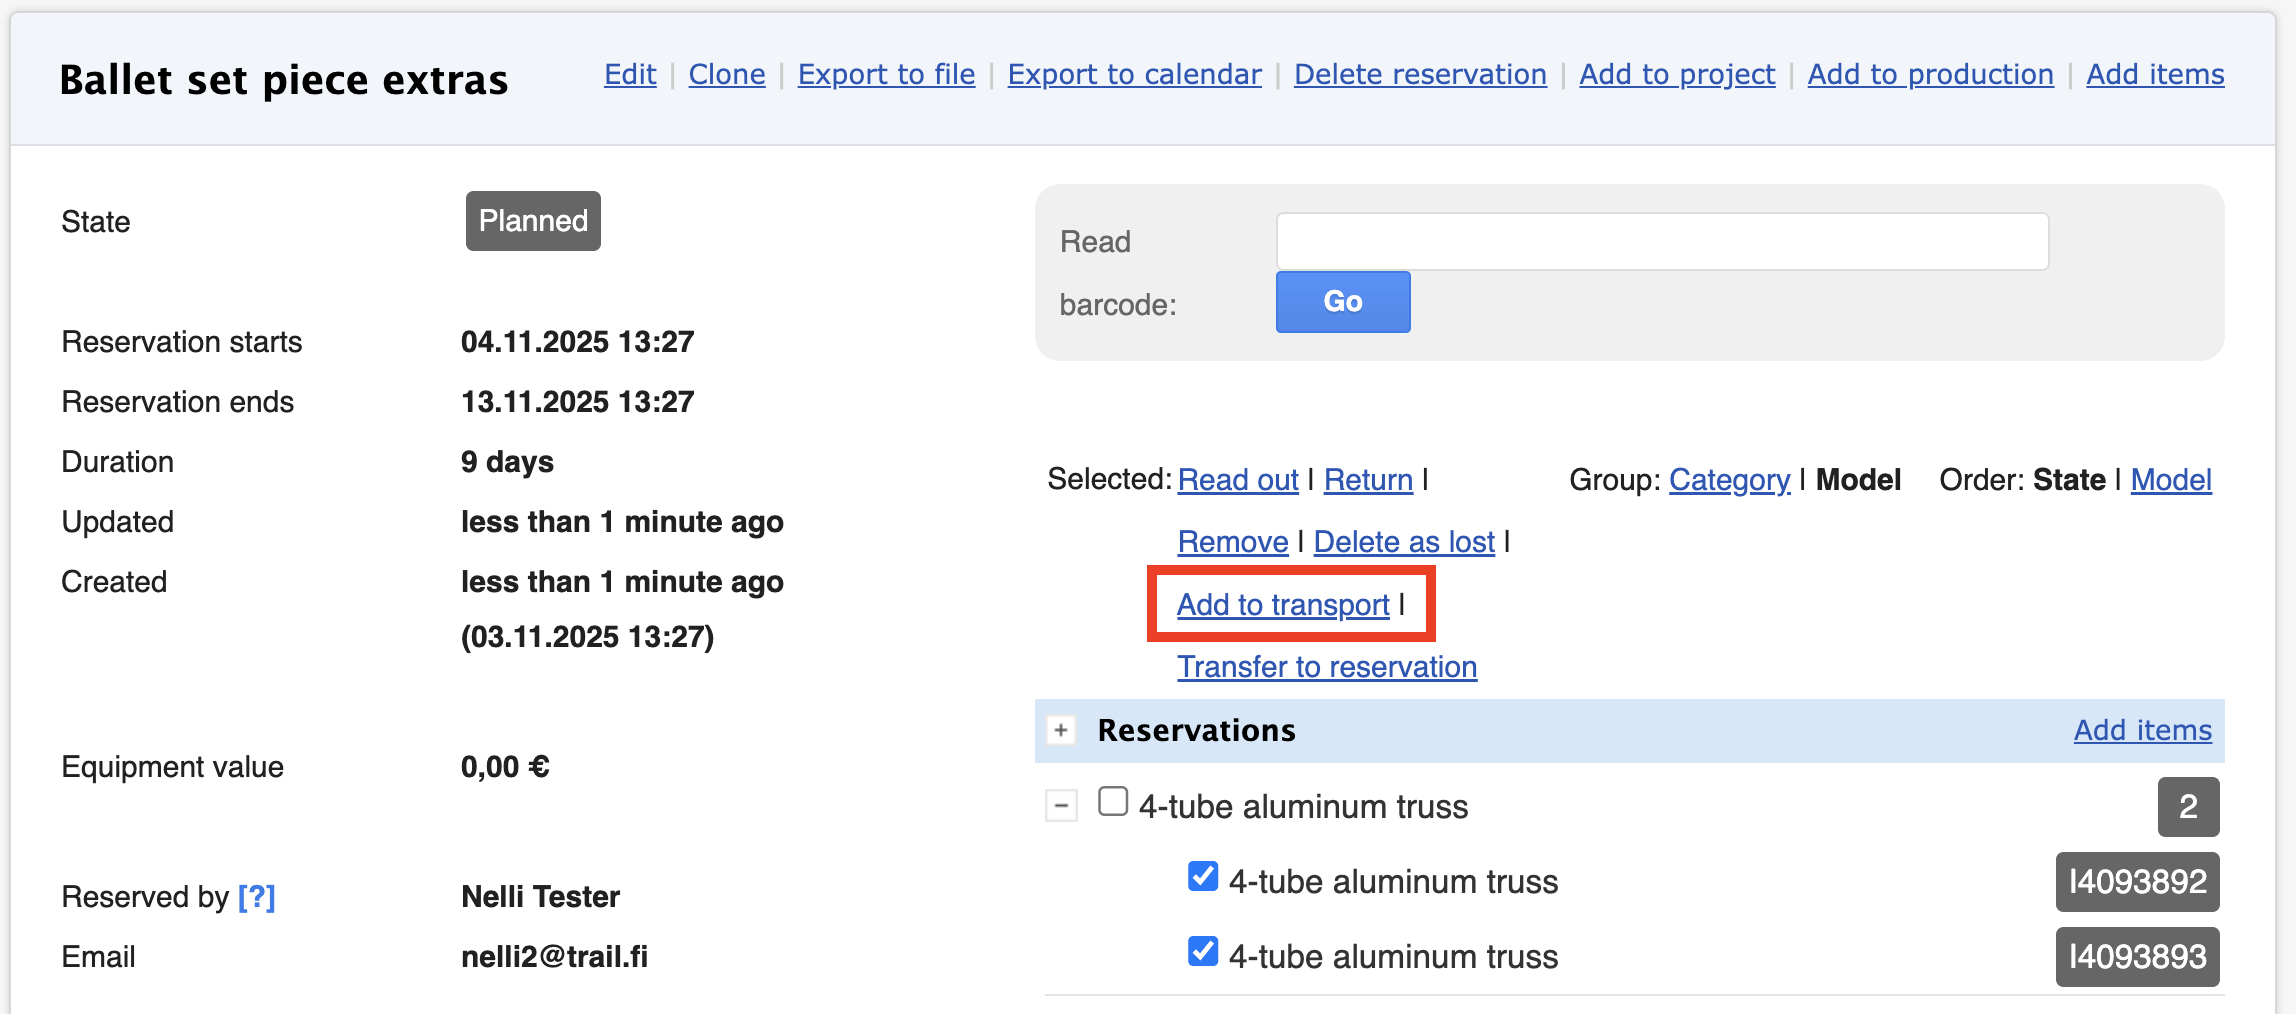
- Open the reservation view
- Select the individual item units (click their checkboxes)
- Click Add to transport
- Select the transport where items should be transported within.
- The items have now been added to the transport, and they are visible in the transport's content.

Performing the transport
Below you can find links to articles for creating transports.
- How to create transport request: Create a new transport
- How to perform transport: Performing the transport (mobile)
Read out and return items in the reservation
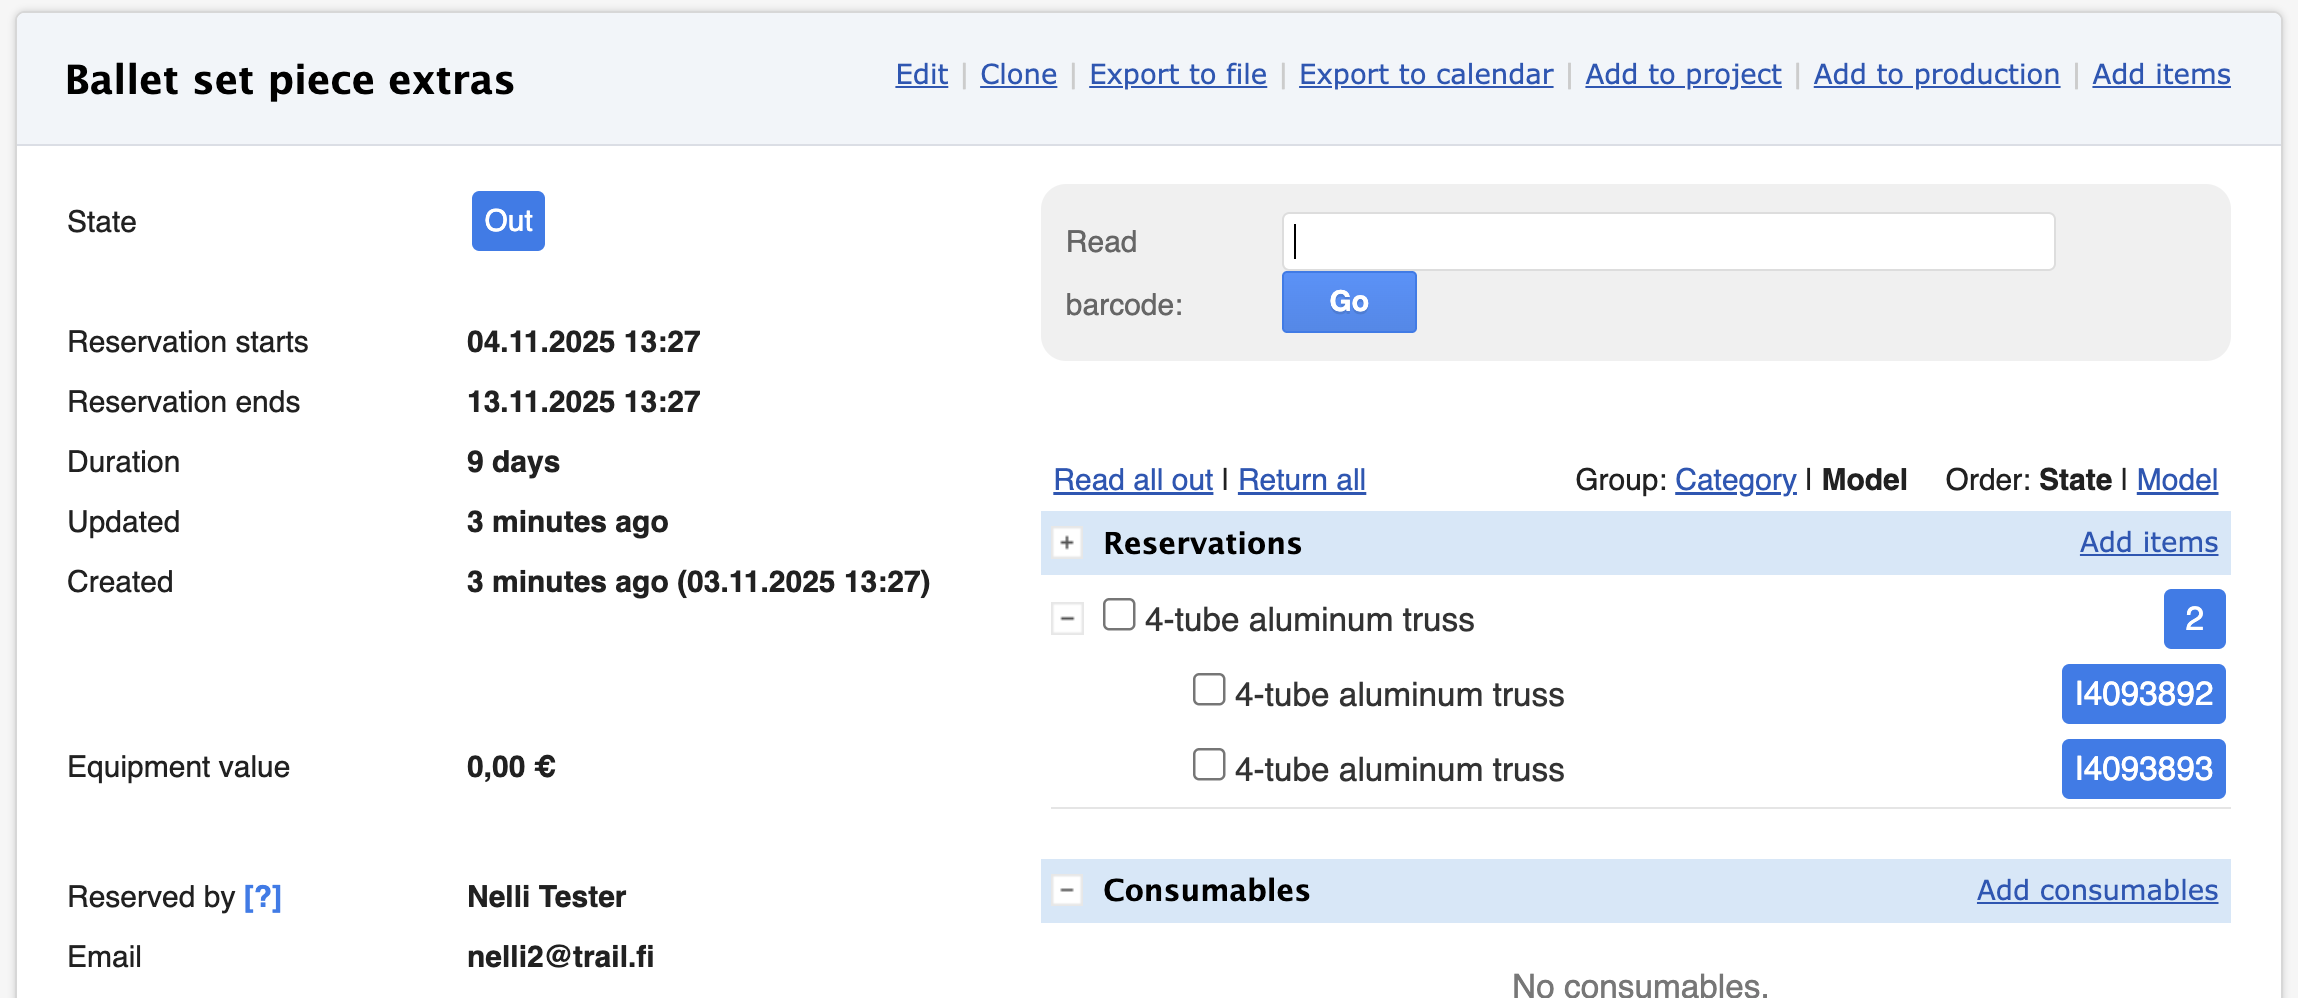
Once the items have arrived at the destination, you can scan the items out to the reservation:
- Open the reservation view
- Scan the QR or barcode of the item
- Read out items appear in blue.
- Return the items, scan the codes again
- Returned items appear in green.
- If the items are transferred back to the warehouse, create a new transport request for their return.