
Users / Adding a new user
Admin users can create new users and assign them appropriate access rights. This guide explains how to add a new user to the system.
Topics:
Creating a New User
- Open Admin → Users.
- Click New User
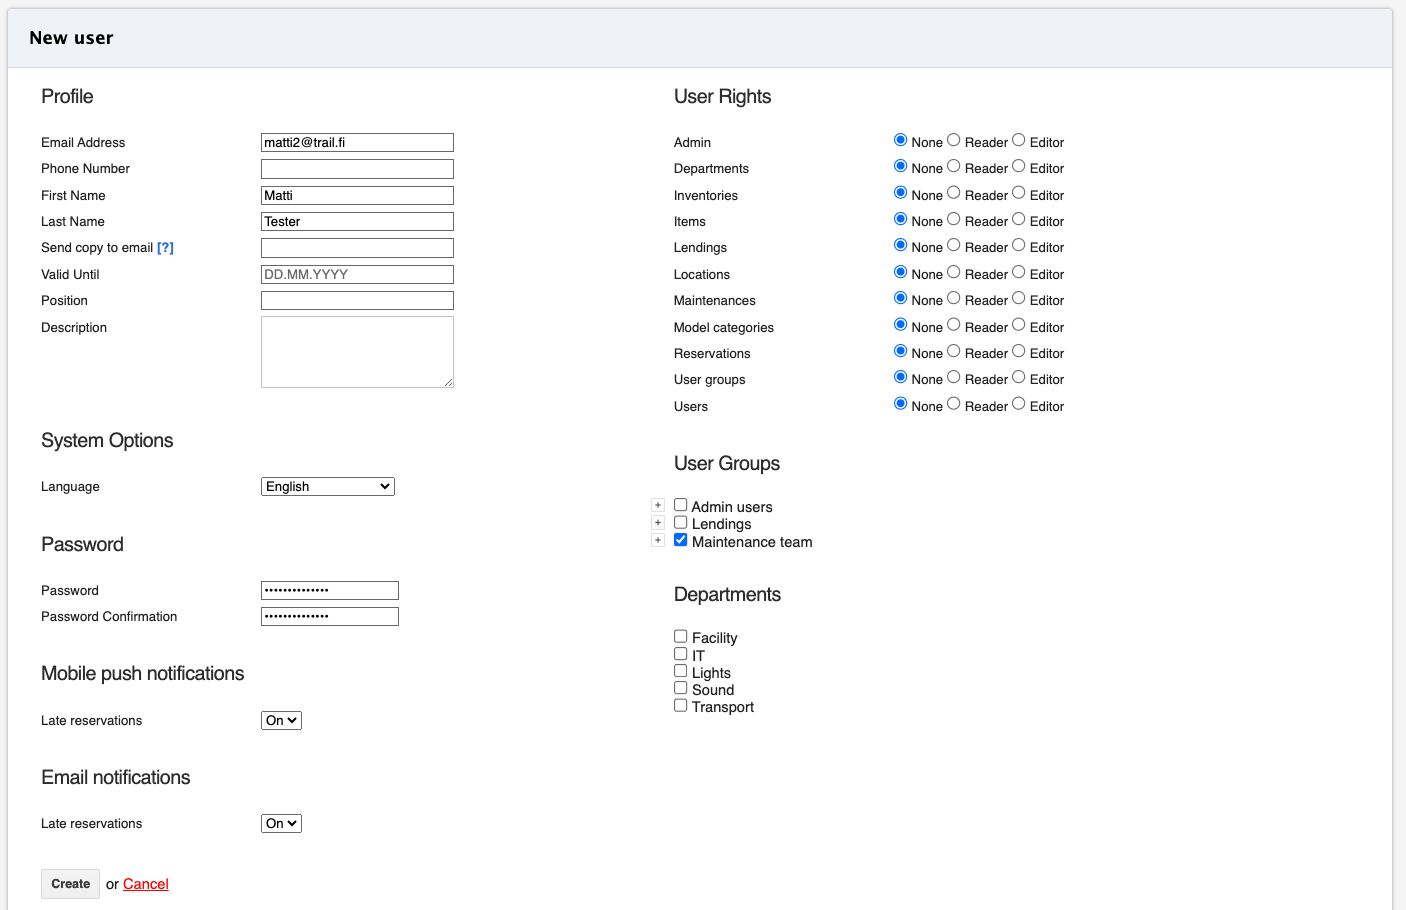
- Fill in the required fields:
- Email address
- First and last name
- Password and confirmation (The password can be reset later, so a temporary password is sufficient at this stage.)
- Define user rights or assign the user to a user group.
- Define department access
- If no department is assigned, the user will not see any device information in the system.
- Please note departments can also be given from user groups.
- Set a Valid Until date if needed, or leave it blank if the end of access is unknown.
- Click Save to create the user.
Note: Trail determines user and department permissions based on the highest level of access granted.
If a user receives permissions through a user group, and additional permissions are assigned individually through the profile, the system will grant the highest of those levels.
Sending a New Password
- Adding a password is mandatory when creating a new user manually. After creation, you can reset the password and Trail sends automatically a new one:
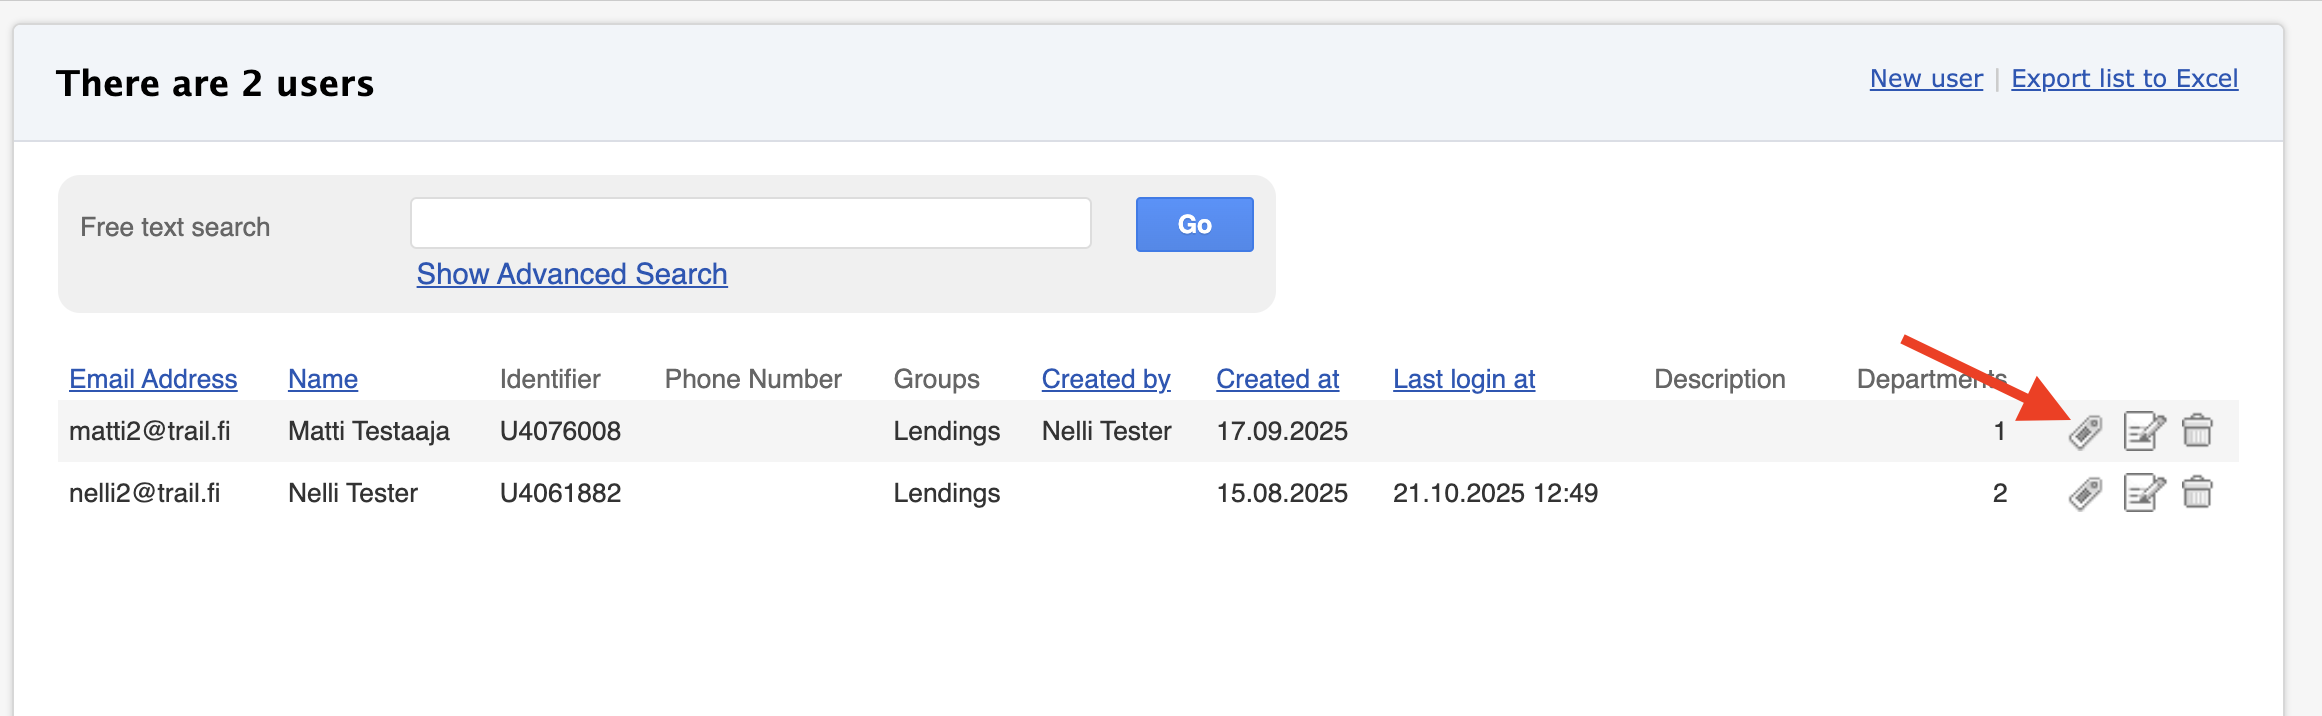
- Open Admin → Users.
- Search for the user.
- Click the note icon on the user’s row.
- Trail resets the current password and sends a new one to the user’s email address.
Note: This password only applies to the Trail login. If your organization uses Single Sign-On (SSO), the SSO password remains managed by your identity provider.
Deleting a User
If a user leaves the organisation, user can be deactivated by two ways:
- Setting a Valid Until date
- Clicking Delete in the user’s profile.
More information can be found here: How to delete or reactivate a user
⭐ Tips:
- After creating a user, double-check their departments and groups to ensure correct access limitations.
-
User groups are an easy and efficient way to manage user rights for multiple users at once.
If you know that several people will be using the system, we recommend using user groups. Learn more: User Groups.